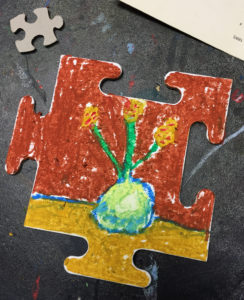
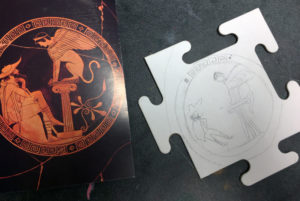
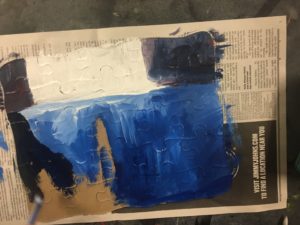
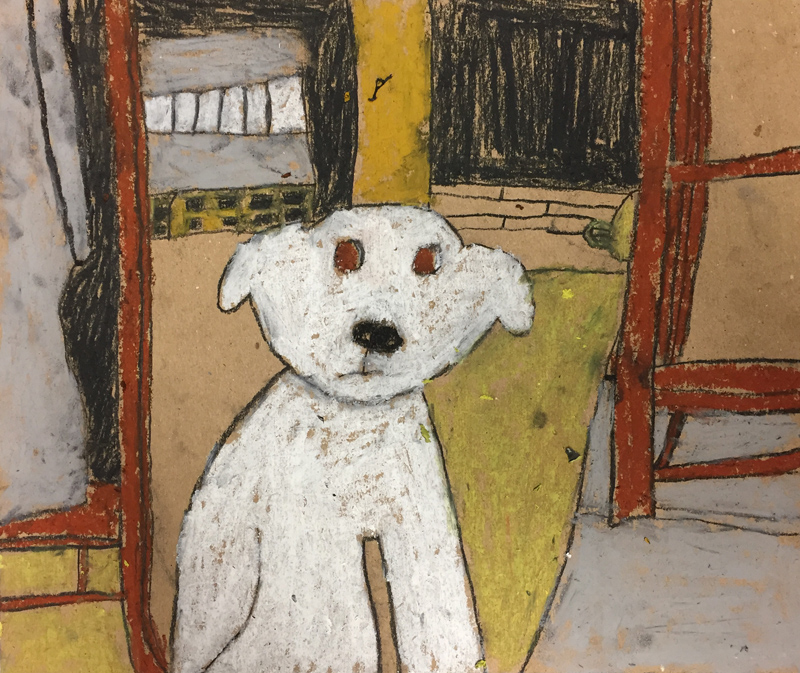
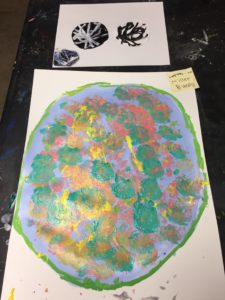
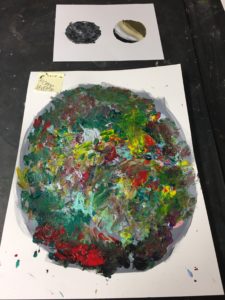
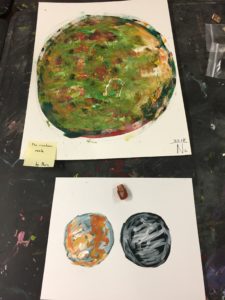
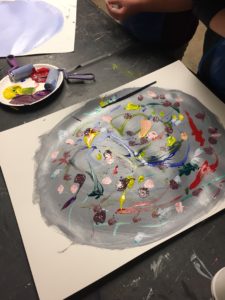
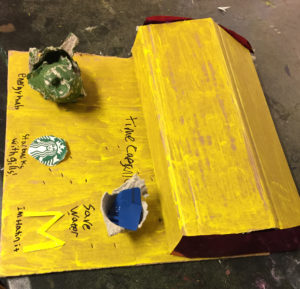
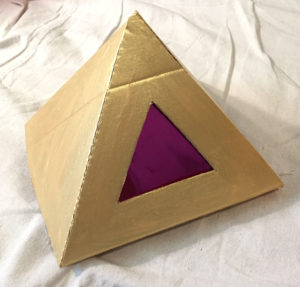
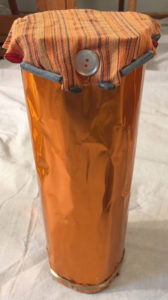
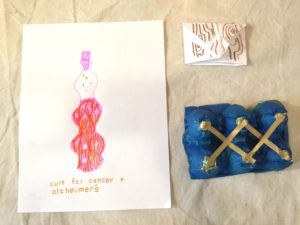
Collaborative Workshop & Final Show– 4.18.19 & 4.25.19

Preparation for Final Show and Button Souvenirs

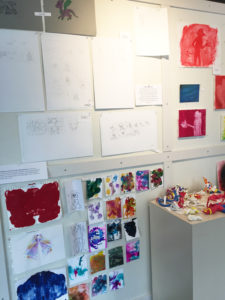
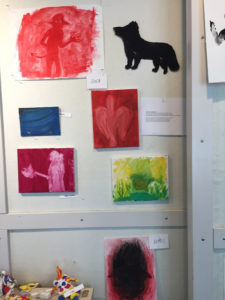
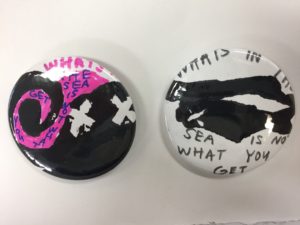
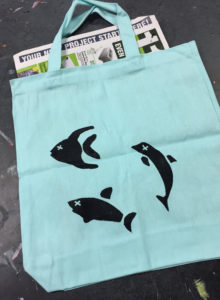
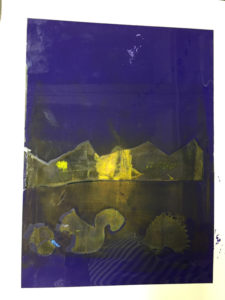
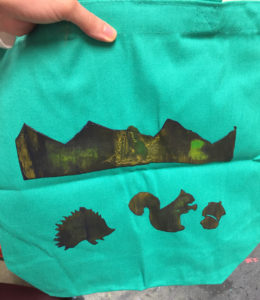
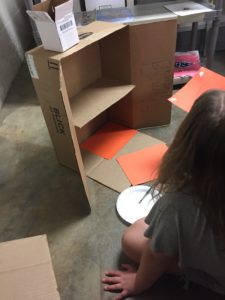
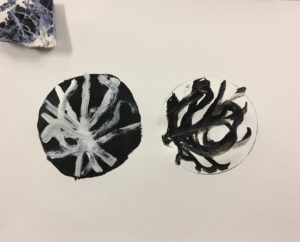
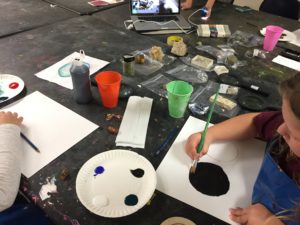
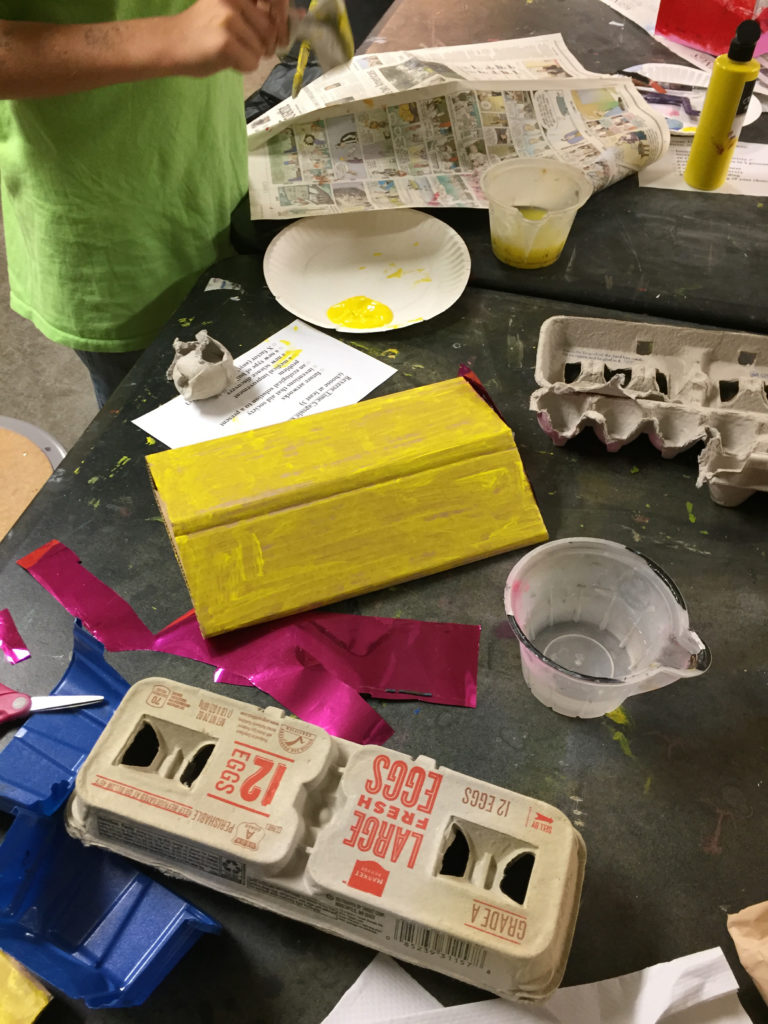
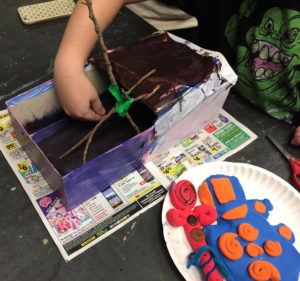
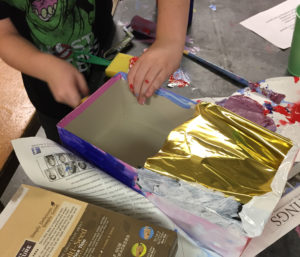
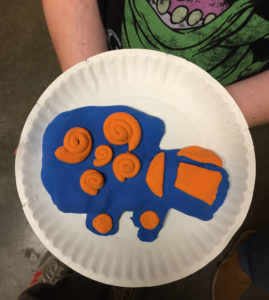
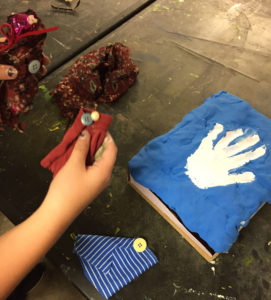
In this final collaboration, the students worked on finishing up their projects from other sessions that they may not have completed for their art show next week.  We also discussed how they could choose what pieces to put in the show and left it up to them entirely, with some encouragement.  They made button souvenirs of images they had previously made if they finished their other projects.  In addition, they filled out surveys informing us of their opinions of the sessions, which were very positive.   Some chose to write an artist statement as well, which we will place next to their work in the exhibition at United Action for Youth here in Iowa City.

Prepping for the Show: Students' Choices

Prepping for the Show: Students’ Choices

 Screen Prints

Finishing up Some Screen Prints

Also working on a Screen Print from Last Session

Also Working on a Screen Print from Last Session


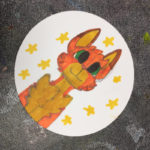
Button in Process

Button in Process

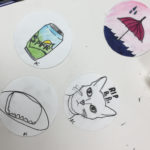
Buttons in Process

Buttons in Process

Buttons After Being Made

Buttons After Being Made


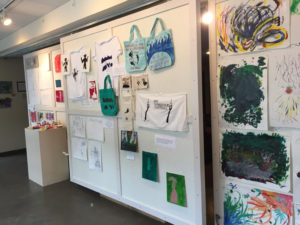
Final Show at UAY in iowa city

Install view

Max’s comics and our collaborative first lesson


My screen printing view

More screen prints

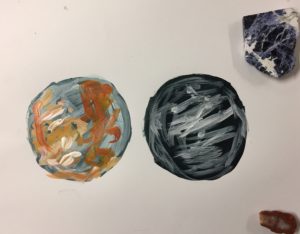
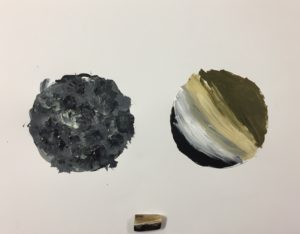
Rub out paintings from the shadow activity

More rub out paintings from the shadow activity


Lesson Plan

Tessa Sutton & Max Johnson
Level or Course: Secondary (grades 7-12)
Time Needed: 90 minutes

 Workshop Overview/Goals: In this activity, students will prepare for the final show at the United Action for Youth Center on April 25, by discussing which pieces they will choose for the show and how they want their pieces put together as a group. After finishing up any remaining pieces that they want in the show, they will be composing an artist’s statement for all their work as a whole and filling out a feedback survey for us. We also have a short art activity for them involving making a button or two as a souvenir of the workshops, based on some part of their art that they made during the sessions. Reflection is a key component of Barry Zimmerman’s social cognitive model of self-regulated learning as well as Dewey’s child-centered philosophy.

NAEA Standards:

  • Creating: Refine and complete artistic work, Anchor Standard 3.
  • Presenting: Select, analyze and interpret artistic work for presentation, Anchor Standard 4.
  • Responding: Perceive and analyze artistic work, Anchor Standard 7.
  • Connecting: Synthesize and relate knowledge and personal experiences to make art, Anchor Standard 10.

Objectives:

  • TLW finish and select works that they want to present for their art show, as well as look over and critique both their work and the work of their peers in order to make the best choices for the show, Anchor Standard 4, Standard 7 & Standard 3.
  • TLW create a button based from their favorite art activity from previous workshops. This will show that the learners will understand how to create a work of art in the form of the button and think about their most memorable work, Anchor Standard 3 & Standard 10.
  • TLW create an artist statement in order to articulate what art means to them, how they plan on using art in the future, and reflect on their own personal style and works through the self-assessment worksheets, Anchor Standard 10.

Visuals:

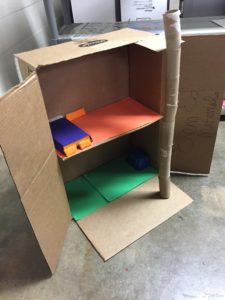
Marcel Duchamp, Boîte-en-valise, 1935-41. Leather valise containing miniature replicas, photographs and color reproductions of works by Duchamp, overall dimensions: 16 x 15 x 4 in.

Teacher Example:

Tessa:

Button Example

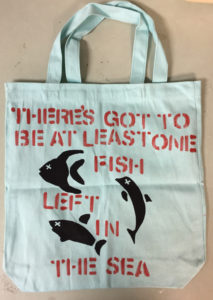
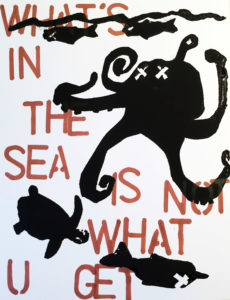
Button Example: What’s in the Sea is Not What You Get.


Vocabulary:
Line: Line is a mark with greater length than width. Lines can be horizontal, vertical,
or diagonal; straight or curved; thick or thin.
Color: is light reflected off of objects. Color has three main characteristics: hue
(the name of the color, such as red, green, blue, etc.), value (how light or dark it
is), and intensity (how bright or dull it is).
Emphasis: force or intensity of expression that gives impressiveness or importance to something.
Souvenir: something that serves as a reminder.
Artist statement: a written text accompanying visual art that gives adds another dimension of meaning and understanding to artistic process.

Supplies, Materials and Resources Needed:
Supplies: Button maker, computer, monitor, any necessary cables.
Materials: Previous student artwork to complete, button backs and fronts, plastic covers, paper in circles for buttons, markers, pencils, erasers, alcohol inks, droppers, rubbing alcohol, oil paint, acrylic paint, brushes, water cups, paper plates, screen printing ink, spoons, paper, T-shirts, bags, paper.

Technology: Computer, monitor, HDMI or other cables to attach computer to monitor

TEACHING PROCEDURE PLAn

Launch: (3 min.)
1. Overview of the final workshop and explanation that they will be finishing up any old work that they want to complete for the show, writing an artist statement, survey and prompts as a summative assessment as well as making a souvenir button.

Instruction or Demonstration with Problem: (5 min.)
2. Discussion about what artwork to choose to put in the show and how we should display their work either by person or by activity.
3. Show the button activity and pass out button circle paper. Teacher will handle the button making machine.

Create: (70 min.)
4. Students work on any pieces that they want to finish up and place in the show and make their button about a part of their art they made already or some aspect of the workshops.
5. Students will write an artist statement. Sheet is attached below.

Closure: (12 min.)
6. Students will fill out a summative self-assessment with prompts (see below in this document) and the workshop survey in order to provide feedback to us about the activities.

Rubric/Assessments/Evaluation/Feedback:

Formative:

  • Questions:
    • What were some aspects of our workshop activities that you found engaging?
    • What were some parts that were not engaging? If any, what?
    • Where there any workshop activities that challenged you? How so?
    • Where there any projects you wish you could go back and re-make?
    • What works are you planning on using for your buttons?
  • Observations:
    • How the learners are engaging in the discussion, what answers are they giving for the questions, if any.
    • Observe what works of art the learners are using for their buttons.
    • See if they are taking the concept of creating an artist statement seriously.

Summative:

Students will be given a self-assessment with prompts to fill out about their work and progress in the workshops. They will also be asked to write a survey over their thoughts about their activities and what can be improved

Accommodations, Enrichments & Extensions

Students who may have difficulty with this lesson:
Accommodations can be made for students who have trouble holding or grasping materials by creating a sponge for them to put their brush or pencil inside of. Students who are hard of hearing may sit nearer to the instructors as well as sight impaired students. Presentations will have large font for people at the back to see clearly.
Advanced Learners: These students can discuss with the teacher about their ideas on how to hang the show or do research on group art shows on their phone.
Students who finish early: These students can make extra buttons or double check they have completed the work for the show.

References:

Duchamp, M. (1935-1941). Retrieved from https://www.moma.org/interactives/exhibitions/1999/muse/artist_pages/duchamp_boite.html.

*Survey and Artist Statement are on the following pages.

Final Workshop Survey

Before you all leave us to pursue bigger and better things, we wanted to ask you a few questions about the time you spent here with us over the past few weeks. These are anonymous and you only need to answer what you want to answer, so feel free to tell us what you’re thinking! Feel free to draw the answers if you want as well!

  • What would you say was the most enjoyable part about coming to workshops?
  • Out of all the workshop activities which one had the biggest impact on your art?
  • If you could go back in time and change one thing about the activities you did, what would it be?
  • Did any of these activities offer challenges in art you haven’t faced before? Which ones if any?
  • What are some comments you want to give Max and Tessa?

________________________________________________________________________

Artist Statement by _______________________________________________

I like these artworks because _____________________________________________________________________________

I envisioned something new when I decided to add ________________________________________________________________

to my artwork.

I took advantage of an accident when I ____________________________________________________________________________

Describe why you chose to do the art you make. Who or what inspired you? What meanings do you see in your work?

When practicing your art gets difficult, what keeps you going?


Example of a Student’s Response:

An Artist Statement
I like these artworks because they show improvement as an artist.
I envisioned something new when I decided to add different mediums.
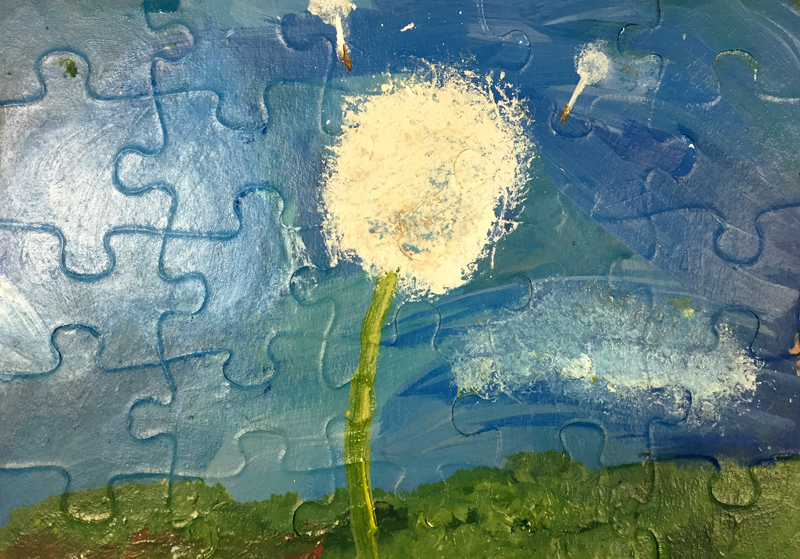
I took advantage of an accident when I accidentally made my clover look like a dandelion.

Who or what inspires you? What meanings do you see in your work?
My dreams inspired me, so it can be hard to tell meaning from it.
When practicing your art gets difficult, what keeps you going?
Going back to paper and pencil and doodling something small.

___________________________________________________________

Survey for Team Tessa!

Please rate the workshops on a scale of 1-5 & circle answer for each one:

5 = Extremely engaging & challenging
4= Very engaging & challenging
3= Somewhat engaging & challenging
2=Not very engaging or challenging
1=I didn’t like this very much.

Workshop #3 – Puzzling Over Memory

5                           4                           3                           2                           1

Comments/Why did you choose your number?

Workshop #5 – Playing with Identity in Shadows & Painting
5                           4                           3                           2                           1

Comments/Why did you choose your number?

Workshop #7 – Subverting Screen Printed Idioms

5                           4                           3                           2                           1

Comments/Why did you choose your number?

Additional comments for Tessa: How can I improve teaching kids at your age and higher ability levels? Other suggestions? I learned a lot from working with you folks, so thank you.


Solo Workshop — 4.11.19

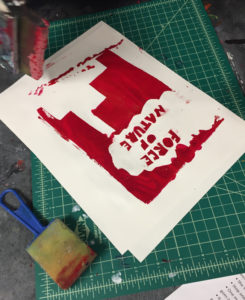
Screen printed subversions

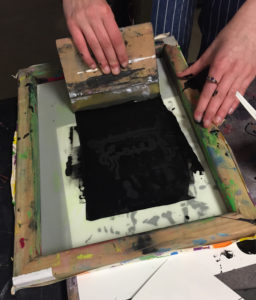
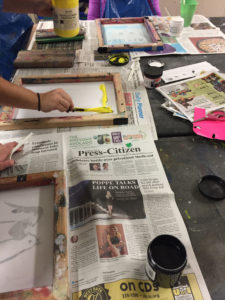
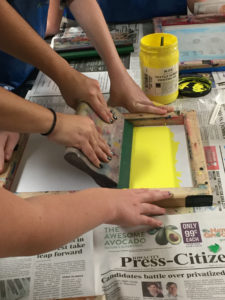
Applying Ink to the Screen

Applying Ink to the Screen

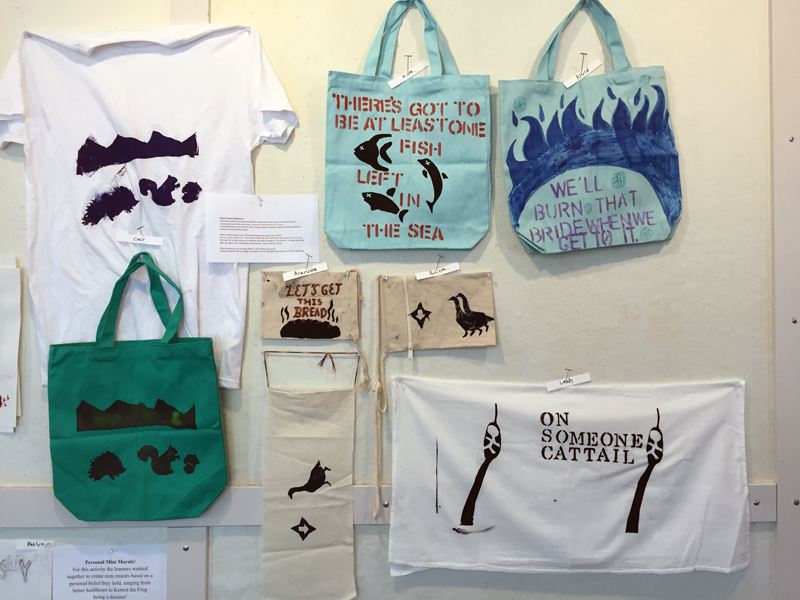
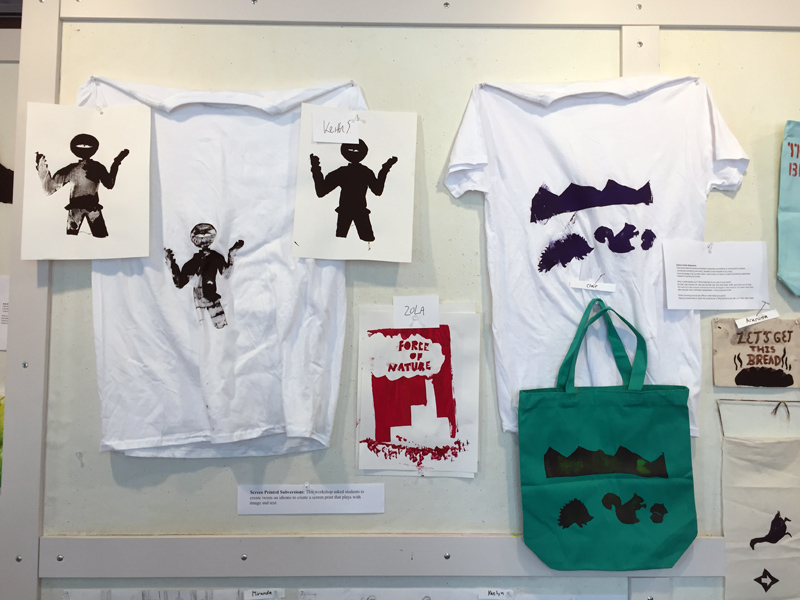
In this last solo workshop using screen printing with text and image, I started with a
warm up on idioms, giving the definition, showing some examples and explaining that I would
like them to twist them into another meaning, in a way that could be absurd, political,
environmental or some other personal concern they had. Since this group is composed of
thinkers, I gave them a book and a deck of cards to check out so they could understand better
what I wanted them to do. I also passed out a handout on idioms about climate change from the
New Yorker. Then, they wrote down three idioms in their sketchbooks and twisted these into
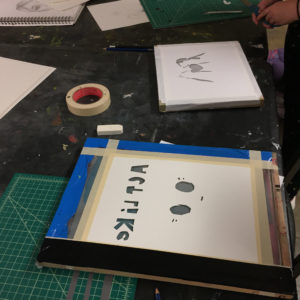
another meaning. After that, I showed slides about artists such as Barbara Kruger who makes appropriation art using image and text. During the demonstration, I explained the process of screen printing step-by-step and put up a slide with the steps. After the demo, they made thumbnails about one or two of their idioms and then went to work drawing on a larger piece of paper, tracing onto the film with sharpie and then cutting out the areas that that were going to be inked for printing.  The launch questions included the following: What is subversion and how do these artists in the slides use it in their art? What are their methods? How can you subvert idioms to create art?

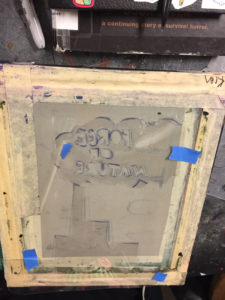
Taping the Clear Film to the Screen

Taping the Clear Film to the Screen

Test Print

Test Print on Paper

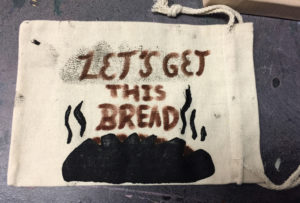
Let's Get This Bread

Let’s Get This Bread

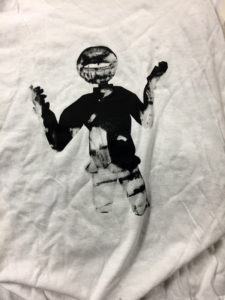
A Character Print

A Character Print

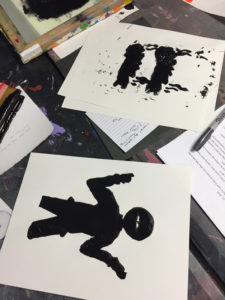
Test Prints

Test Prints

Student Print of Twist on Idioms for Climate Change

Student Print of Twist on Idioms for Climate Change

Bag in Process

Bag in Process

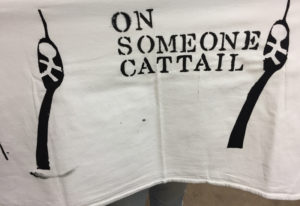
A Print

A Print on the Spin of the Idiom: Riding on Someone’s Coat Tail.

Screen with Ink

Screen with Ink

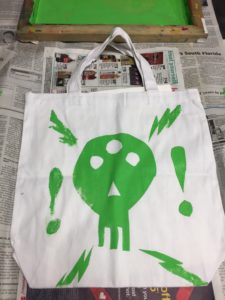
Print of Acid Rain on a Bag

Print of Acid Rain on a Bag

_____________________________________________________________________________

Name: Tessa Sutton
Grade Level: 7-8
Time needed: 90 minutes
Class Size: 20-25

Overall Goal: The goal of this activity is to allow students to explore screen printing techniques and materials through the use of subverting and playing with idiomatic phrases from the English language, connecting them to their personal interests.

Problem: How can you subvert the meanings of pre-existing idioms and create a new play on words through experimenting with illustration in screen printing? How can you play with these meanings while connecting them to your environmental, social and political interests?

Big Ideas: Storytelling, Self-Expression, Subversion, Wordplay, Imagination, Play, Humor

Description & Purpose: Students will explore screen printing on T-shirts, cotton bags or paper of their choice through twisting idioms into personal concerns that could range from the serious to the absurd. By altering these phrases, they make the viewer stop and take a second look, coming in closer to the subject matter. The purpose is to make students not only question the language that is taken for granted to be reinvented, but to see the space between language and text that artists like Barbara Kruger and others have used widely, as well as communicate their personal concerns.

Importance: Subversion means altering something existing and twisting the meaning into another form. Artists have used wordplay and subversion since the Dadaists recombined language in their art. Using idioms, which are already abstracted from the English language encourages students to play with already puzzling language. Subversion involves a change in expectation experienced by the artist in their everyday lives, or teasing the audience into thinking they understand one aspect, but the artist is talking about another. This concept can be applied aesthetically, conceptually and personally in a work of art. By experimenting with screen printing techniques, the student can explore applying this idea as their subconscious comes into play. Olivia Gude relates how students should use their personal interests and experiences when creating art as well as play with deconstructing culture.

Art Concepts/Technical Skills: Students can explore the connection between image and text in their pieces through illustration and visual storytelling with minimalistic images using screen printing stencils. They will also investigate how artists have used subversion in their work and how they could apply this to their own.

SPECIAL PRE-INSTRUCTION PREPARATIONS

  • Teacher will need to collect enough printing screens for students to use individually as well as screen printing film.

Common Errors or Misunderstandings

  • Students may not understand negative space and that what you remove from the screen film will be the part with the ink that comes through.
  • Students might not comprehend how to make layers by covering parts up on the screen.
  • Students may not know what idioms are.
  • Teacher will explain to students that the negative space on the final product will not have ink and the places they remove with the exact-o knife will have the ink come through. They may choose to make the negative space ink-filled but only after understanding it.
  • Teacher can show negative space and where the ink will come through in the demonstration.
  • Teacher will explain in demonstration how certain areas can be covered with duct tape if they want to work in layers, allowing the paint to dry between each one.
  • Instructor to explain the meaning of idioms in the slides.

National Standards

  1. CREATING: Generate and conceptualize artistic ideas and work, Anchor standard 1.
    Enduring Understanding:
    Creativity and innovative thinking are essential life skills that can be developed. Artists and designers shape artistic investigations, following or breaking with traditions in pursuit of creative art-making goals.
  2.  PRESENTING: Convey meaning through the presentation of artistic work, Anchor standard 6.
    Enduring Understanding:
    Objects, artifacts, and artworks collected, preserved, or presented either by artists, museums, or other venues communicate meaning and a record of social, cultural, and political experiences resulting in the cultivating or appreciation and understanding.
  3.  CONNECTING: Synthesize and relate knowledge and personal experiences to make art, Anchor standard 10.
    Enduring Understanding:
    Through art-making, people make meaning by investigating and developing awareness of perceptions, knowledge and experiences.
  4.  RESPONDING: Interpret intent and meaning in artistic work, Anchor Standard 8.
    Enduring Understanding:
    People gain insights into meanings of artworks by engaging in the process of art criticism.

Learning Objectives

  1. TLW observe and discuss the artists presented in the slides in a group in order to analyze how art can show subversion through graphic elements. Anchor standard 8.
  2. TLW design and create at least one screen print of their twisted idiom on a T-shirt, bag or bandanna through first brainstorming at least three thumbnail sketches from the warm up of three twisted idioms based on their personal concerns about environmental, social and political issues. Anchor standard 1 & Anchor standard 10.
  3. TLW place their work on the tables for a gallery walk for the students to observe and discuss their processes by interviewing a partner and recording on a note card. Anchor Standard 6.

teacher Materials

  • Teacher example of print
  • Exact-o knives
  • Duct tape paper for “islands” needed to fill in spaces not attached to other parts of stencil
  • Stencil film
  • Duct tape
  • Computer with any cables needed
  • Monitor
  • PowerPoint
  • Process / technique demonstration materials: squeegee, screen at least 8 x 10 in., water based screen printing ink, plastic spoons, paper to print on.

Student Materials

  • Paper (can be a sketchbook)
  • Heavy paper for test print
  • Cardboard
  • Glue
  • Masking & duct tape
  • Scissors & exact-o knives
  • Cutting mat
  • Pencils
  • Screen frame
  • Fabric pens
  • T-shirts, bags and bandannas for each student (at least one of each per person)
  • Duct tape paper sheets: 8.5 x 11 in.
  • Squeegee
  • Paper plates
  • Plastic spoons
  • Stencil film
  • Stencil letters of a small size (in case they want to do writing on their pieces)
  • Note cards of any size
  • Sharpies of various colors

Artists in context: Key artists

Barbara Kruger, Max Ernst, Hank Willis Thomas, Marcel Duchamp, Steve Gianakas, Kurt Schwitters and Theo van Doesburg

Key artworks

Kruger

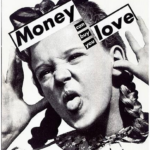
Barbara Kruger, Untitled (Money Can Buy You Love), Collage, 7 x 8 in., 1985


Kruger 2

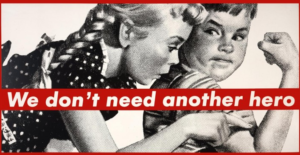
Barbara Kruger, Untitled (We Don’t Need Another Hero.), Photo screen print on vinyl, 100 x 209 x 2 in., 1987.

Thomas

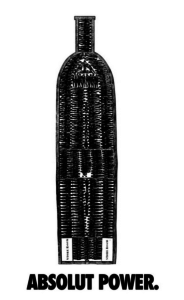
Hank Willis Thomas, Absolut Power, Inkjet print on paper, 40 x 28 in., 2003.


Schwitters

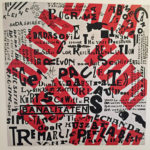
Theo Theo van Doesburg and Kurt Schwitters, Small Dada Evening, Lithograph, 11.8 x 11.8 in.,1922.

Ernst

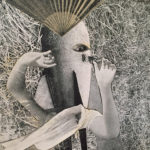
Max Ernst, The Chinese Nightengale, Ink on paper mounted on board, 5 x 3.5 in., 1920.

Duchamp

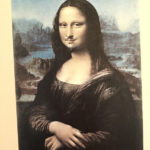
Marcel Duchamp, L.H.O.O.Q., Pencil on reproduction, 25.5 x 19 in., 1930.

Gianakos

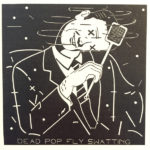
Steve Gianakos, Dead Pop Fly Swatting, Acrylic on canvas, 30 x 30 in., 1981.

Teacher Example

teacher example

Stop Global Warming. Acrylic screen print on paper, 8.5 x 11 in., 2019.

Key Critical questions

  1. What is subversion?
  2. What are the different ways these artists subvert images with text? How is text used in each to convey meaning?
  3. How could you use the methods of the Dadaists in your piece? What are these methods?
  4. How do you see that they use appropriation as a way to work with subversion? Why do you think they use this?

Vocabulary and Language Acquisition

Discipline Specific (Syntax)

Space: is the area between and around objects. The space around objects is often called negative space; negative space has shape. Space can also refer to the feeling of depth. Real space is three-dimensional; in visual art, when we create the feeling or illusion of depth, we call it space.
Negative Space: the space around the subject of the work of art, such as shapes or forms.
Contrast: a principle of art that refers to the arrangement of opposite elements (light vs. dark colors, rough vs. smooth textures, large vs. small shapes, etc.) in a piece, so as to create visual interest.
Emphasis: is the part of the design that catches the viewer’s attention. Usually the artist will make one area stand out by contrasting it with other areas. The area could be different in size, color, texture, shape, etc.
Graphic Design: the art or profession of using design elements (such as typography and images) to convey information or create an effect.
Shape: the visible makeup characteristic of a particular item or kind of item.
Unity: a combination or ordering of parts in a literary or artistic production that constitutes a whole or promotes an undivided total effect.
Islands (in screen printing): Refers to the parts of an image that are not connected to other parts of the image, where you do not want ink to go through onto your print.
Appropriation: in art and art history refers to the practice of artists using pre-existing objects or images in their art with little transformation of the original.

Academic

Deception: the act of causing someone to accept as true or valid what is false or invalid.
Idioms: an expression in the usage of a language that is peculiar to itself either grammatically or in having a meaning that cannot be derived from the conjoined meanings of its elements.
Wordplay: playful use of words; verbal wit.
Subversion: to pervert or corrupt by an undermining of morals, allegiance, or faith.

Language Functions analyze, compare/contrast, critique, describe, interpret, question, etc.
Language Modes Reading Writing Listening Speaking
 
  • Students will analyze a small amount of reading in PowerPoint and if they do research on their phones/computers.
  • Visual reading of images in slides, looking at content, style and meaning.
  •  Writing the closure statements at the end of class.


  • Students will listen to each other during presentations and collaborative time.
  •  Students will listen to the teacher during the introduction and demonstration of the lesson.


  • Students will respond to teacher and classmate’s questions and offer ideas during discussion time.
  • Students will respond to each other and ask questions when/ if they are confused or struggling during studio time.
  • Students will practice speaking in front of the class during presentations.

ACCOMMODATIONS FOR SPECIFIC DIVERSE LEARNERS

Enrichment and Extensions
  • Advanced students can research more specific information and images about their twisted idiom and combine imagery found online.
  • These students can also work in multiple layers for their piece and integrate text in the image.
Activity for Early Finishers
  • Students who finish early can work on the lettering for the piece or the backside of the T-shirt or bag, if using one.
  • They can make a second print of their first stencil on another material.

OBJECTIVE-DRIVEN ASSESSMENTS

Describe the tools/procedures that will be used in this unit to monitor students’ learning of the lesson objectives. Attach/paste a copy of the assessment and evaluation criteria/rubric at the end of the lesson where the assessment will take place.

Lesson # Objective # (s) Informal or Formal? Description of Assessment Modifications to Accommodate All Students Evaluation Criteria: What evidence of student learning related to the learning objectives and central focus does this assessment provide?


TLW observe and discuss the artists presented in the slides in a group in order to analyze how art can show subversion through graphic elements, Anchor standard 8. Informal


TLW engage in a discussion with peers and teacher about how the artists shown in the slides play with text and image through subversion in their art. Students can write on a paper if they do not feel comfortable sharing in front of the group, or speak with a partner nearby. Students verbally express and give immediate feedback on the quality and depth of their answers regarding understanding how subversion is used in the art shown. By giving examples of this, it shows the depth of students’ understanding of the idea of subversion, how it is used in art and how they could apply these to their own work.
  TLW brainstorm and draw at least three thumbnail sketches from the warm up of three twisted idioms based on their personal concerns about environmental, social and political issues. Anchor standard 1. Informal Teacher will walk around the room and ask questions to check students’ understanding of the activity verbally. Teacher will check that thumbnails have been completed and discuss which one the student will use before proceeding to screens.


Student can make one thumbnail sketch instead of three. Teacher or peer can help with sketching, if needed. Students demonstrate skill in generating twisted idioms through wordplay and connecting them to personal concerns in the medium of screen printing with a print artifact.
  TLW design and create at least one screen print of their twisted idiom on a T-shirt, bag or bandanna based on their preliminary sketch of choice. Anchor standard 10.  Informal) Teacher will observe that students are making the screen prints correctly and ask questions to check for understanding. Teacher or peer can assist in screen printing and cutting process through verbal direction by student. This shows that students are able to reflect on their sketches and choose their most successful one as well as complete the technical aspects of screen printing.
  TLW place their work on the tables for a gallery walk for the students to observe and discuss their processes by interviewing a partner and recording on a note card. Anchor Standard 6. Informal & Formal (Summative) Gallery walk when students are done creating their prints and interviewing each other while recording responses on note cards. Teacher can talk to the student and they can respond verbally or through a device. Students can write their answer to another student. Students will show they are able to share their images and gain insight from discussing the meaning of the work and each other’s processes while making them public on a card.

REFERENCES

Barbara Kruger, feminist art. (n.d.). Art history archive. Retrieved from http://www.arthistoryarchive.com/arthistory/feminist/Barbara-Kruger.html.

Blythe, S., & Powers, E. (2006). Looking at Dada. New York: NY: Museum of Modern Art.

Gude, O. (2007, January). Principles of possibility: Considerations for a 21st-century art & culture curriculum. Art Education, 6-17.

Hank Willis Tomas, “Absolut power” and “Afro-American express.” (2014). Black Atlantic, Duke University. Retrieved from
https://sites.duke.edu/blackatlantic/sample-page/depictions-of-the-middle-passage-and-the-slave-trade-in-visual-art/absolut-power-afro-
american-express-middle-passages-5-middle-passage-middle-passages-ii-curatorial-statement/hank-willis-thomas-absolut-power/.

Kruger, B. Untitled (we don’t need another hero). (1987). Whitney Museum of Art. Retrieved from https://whitney.org/collection/works/34103.

Terban, M. (1996). Scholastic dictionary of idioms. New York, NY: Scholastic, Inc.

Tucker, M. (1981). Not just for laughs: The art of subversion. New York, NY: New Museum.

Word definitions. (2019). Merriam-Webster Dictionary. Retrieved from https://www.merriam-webster.com/dictionary.

Launch

Instruction Methods

  • How do artists use subversion in their work? Are there any you can think of who use text with images?
  • How can you play with the meanings of idioms while connecting them to your environmental, social and political interests?
  • What is the relationship between text and image? How do they talk to each other?

Warm Up: (5 min.)
1.      Teacher will show handout on idioms and explain what they mean in the slides.
2.      Students will come up with idioms through the book provided, by researching online or talking to a partner.
3.      After finding three idioms, they will write these in their sketchbook and play around with twisting them to create different meanings.

  • Verbally and through the slides.
Instruction Instruction Methods
Procedure
Lesson Introduction:
(10 min.)
4.     Instructor will present the problem generally that they will be making at least one screen print, on a T-shirt, cotton bag or bandanna, of a twisted idioms that connects with a personal interest of some kind. Teacher also explains they will be making three thumbnail sketches before from the warm up idioms and clarifying with the instructor before proceeding. (2 min.)
5.      Slide presentation of short history of subversion using images and text.      (5 min.)
6.      Teacher presents the technique of screen printing through a live demonstration and shows previously made examples, making sure the proper way to use an exact-o blade on their cutting mat, noting hand placement away from blade. (3 min.)

Create: (65 min.)
7.    Students will have time to brainstorm three thumbnails then check with teacher for the next step listed below. Students can do research on their phones online.
8.    They will draw one of their approved sketches on a larger paper scaled to the size of the chosen screen (and the film) in pencil or marker. They can tape the film over their image drawn on a larger paper of their sketch and trace with a dark sharpie marker.
9.     Students trace the lines onto their screen film and place an X over the parts they are cutting out so they know it will be clear to them where the ink will go.
10.     Student tapes the film to their screen with duct tape. They also use the duct tape paper to cut out any “islands” and cover up any areas that ink might go through where they do not want it. (An “island” is a place not connected to the main image that they want to be ink-free.)
11.   Student helps another with holding the screen down while other one pulls squeegee over screen after applying approx. two tablespoons of ink on the screen top. Student makes two passes: one applying pressure pulling towards you and then sideways, if possible, otherwise picking up squeegee and applying another pass towards you.
12.    Lift screen and let image dry before adding another layer. Student can cover other layer with duct tape paper if they want layers, covering up more areas as they go.
13.   If students are using text with fabric markers or other markers and a stencil, they must allow the piece to dry first before using letters. They could have used text first if they want it to be semi-covered up though.

Closure: (9 min.)
14.  Students will display their work on their tables for peers to see in a gallery walk.
15.  They will interview a partner about their work and record answers on a note card placed next to their work to the following questions: What did you learn about using image and text or using subversion in your art? Do you have any insights into your process that you want to share with other people?|
16.   They will walk around a final time to view cards and images.

Clean up: (6 min.)
17.    Students will return materials to their proper places, clean and organized.

Structured Practice and Application

  • Opportunity for Independent Practice: Students can practice on a piece of paper cutting out their image if they are hesitant about how the process works with the stencil film.
  • Supplemental Texts:
    Books available in class: Terban, M. (1996). Scholastic Dictionary of Idioms. New York, NY: Scholastic, Inc.
    Blythe, S., & Powers, E. (2006). Looking at Dada. New York: NY: Museum of Modern Art.
    Digital: Ginny Hogan’s “Updated Idioms on Climate Change:” https://www.newyorker.com/magazine/2019/01/21/idioms-updated-for-climate-change
  •  The goal of this activity is to allow students to explore screen printing techniques and materials through the use of subverting and playing with idiomatic phrases from the English language, connecting them to their personal interests.
  • Problem: How can you subvert the meanings of pre-existing idioms and create a new play on words through experimenting with illustration in screen printing? How can you reinvent with these meanings while connecting them to your environmental, social and political interests?
    • Students will explore with materials and through making three thumbnail sketches.
    • They can also discuss their ideas with another student in order to brainstorm ones they could not think of by themselves.

Assessment:

  • Formative: Teacher will circulate through the room observing students’ artwork to see if they understand the screen printing techniques and process and are playing with changing idioms in their brainstorm sketches. Instructor will ask if they have any questions about the activity.
  • Summative: Students will place their objects on the table in the gallery walk and then choose a partner to interview and record their partner’s responses to the following questions on a note card that will be placed near the work in public: What did you learn about using image and text or using subversion in your art? Do you have any insights into your process that you want to share with other people?
  • Verbal instructions then slides shown.


  • Live demonstration.


  • Verbal instructions and a slide with the parameters of the activity on the monitor.


  • Slide will contain instructions for the closure and they will also be given verbally.


Closure Instruction Methods
 

Lesson Closure: See summative assessment. After the interviewed students place note cards on table near their work, the students will walk around once more.

  • Verbal instructions to write on paper and a slide with instructions.
FROM THE NEW YORKER


Solo Workshop — 3.28.19

Playing with Identity in Shadows & Painting

A Student's Warm Up

A Student’s Warm Up

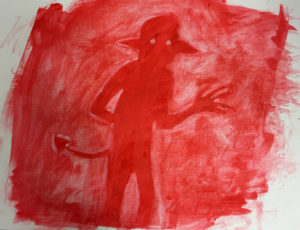
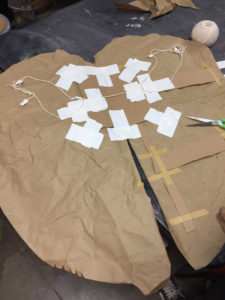
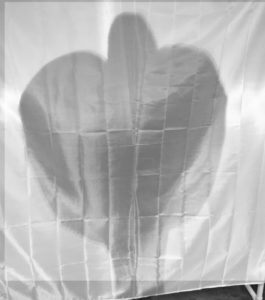
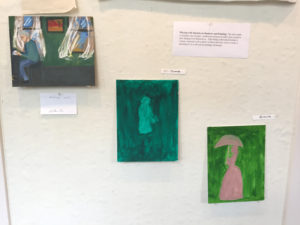
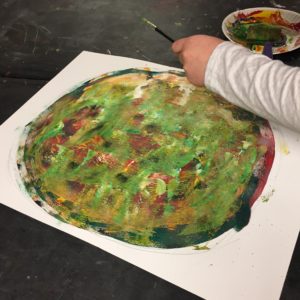
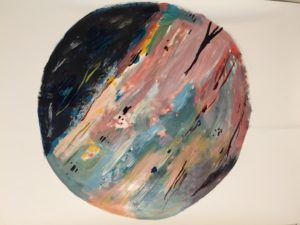
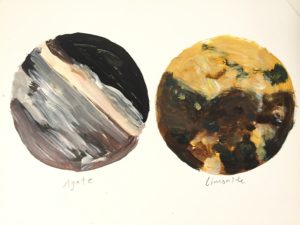
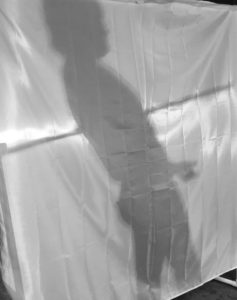
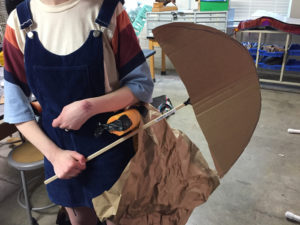
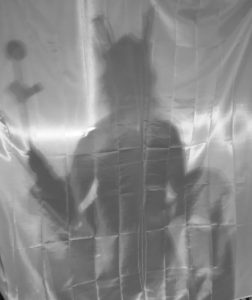
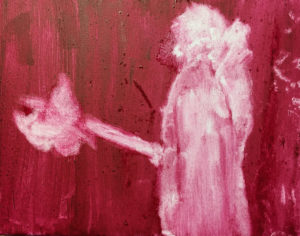
In this workshop, students explored the idea of identity through disguising themselves as a character, object, person, animal or other creature of their choosing, then experimented with water-based oils in a rub-out or montage painting. In the warm up, I asked the students to choose an object in the room and go behind a white, back-lit screen to change their appearance. They had access to pool noodles, balls, wood, recycled paper, cardboard and craft paper. Afterwards, I showed them slides on Kara Walker, the history of silhouettes and other artists in relation to identity in art. Then, they made costumes out of these materials, went behind the screen and took photos of each others’ personas. After that, they experimented with painting their creations.
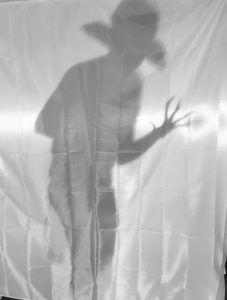
Another Costume

Another Devilish Costume

Creature Rub-Out Painting in Water-Based Oils
Creature Rub-Out Painting in Water-Based Oils


Behind the Scenes of a Costume

Behind the Scenes of a Costume Made to Look Like a Bustle
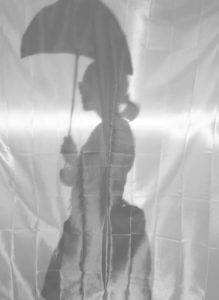
Bustle Costume
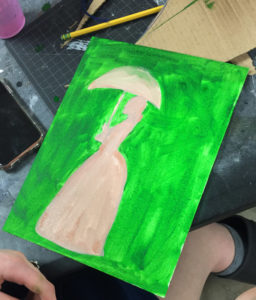
Bustle Costume

Bustle Painting

Bustle Rub Out Painting

Spring Goddess
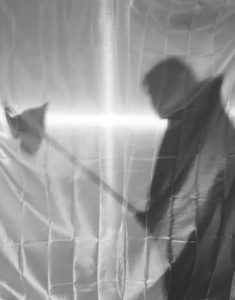
Spring Goddess


Student's Costume

Student’s Costume

Costume Painting

Costume Painting

Also Making Wings

Making Wings

The Wings

The Wings

Two Students Playing Around

Two Students Playing Around

Making Wings

Making Wings

Matching Painting

Matching Painting

_____________________________________________________________________________


Grade Level: 7-8
Time needed: 90 minutes
Class Size: 20-25
Overall Goals:
Problem: If you could be a different creature, person or object, what would you be and how can you explore this through shadow play and make a painting related to your experimentation? Does role-playing and creating an image help you internalize or express empathy or see another aspect of yourself?

Big Ideas: Empathizing, Role-playing, Imaging, Body Thinking, Storytelling, Self-Expression

Description & Purpose: Students will be asked to make a sculptural costume for themselves out of paper to make a shadow and act out a new identity behind a screen or sheet with a strong light source behind. Someone else will take a photo of them on the first student’s phone. After, the student will explore a painting with their new identity, placing themselves in a new context of their choosing, using a choice of two techniques: rub out or montage. They can investigate a new part of themselves as well as the qualities of another person, character or object.

Importance: According to Erik Erikson’s theories of development, part of what drives students at this age is exploring their identity not only by themselves, but in relation to peers (Woolfolk, 2019). By providing students a screen to stand behind, those at this age are often inhibited and so this gives them a chance to reveal themselves by hiding.

Art Concepts/Technical Skills: Students will experiment with a rub out painting technique on canvas or a montaged one on paper, where they cut out the outline of their shadow either before or after painting (allowing time to dry) and place in a new context (background). They will also consider silhouettes and how past and contemporary artists have used this method. Students will also learn in the slides about how artists have worked with identity.

SPECIAL PRE-INSTRUCTION PREPARATIONS

  • What special preparations need to be made by the teacher before beginning this unit? Schedule a field trip? Schedule a guest speaker? Have students compile/collect special supplies? Have specific equipment on hand? Etc.
  • Teacher will need to have a sheet strung in the room or a screen available for the students to use as well as have a strong light source to project behind.

Common Errors or Misunderstandings

  • What are common errors or misunderstandings of students related to the central focus of this lesson?
  • Some students might not understand that they have to create a silhouette so their costume doesn’t need to be aesthetic (unless they want it to be), just be able to show parts of their object/person in a shadow.
  • Students may not comprehend how to make a rub-out or a montage.
  • How will you address and/or respond to these for this group of students?
  • Teacher will show a slide of her image or demonstrate how her costume creates a shadow.
  • By demonstration these painting techniques in person, the teacher will explain the nuances of them.

National Standards

1.    CREATING: Organize and develop artistic ideas and work, Anchor standard 2.
2.    PRESENTING: Select, analyze and interpret artistic work for presentation, Anchor standard 3.    CONNECTING: Synthesize and relate knowledge and personal experiences to make art, Anchor standard 10.
4.     RESPONDING: Interpret intent and meaning in artistic work, Anchor Standard 8.

Unit Learning Objectives

1.      TLW explore a shadow play identity, documenting their work in a smart phone photo and translating the image into either a rub-out painting on canvas or a montage painting on paper, both with a background. Anchor standard 2.

2.      TLW observe and discuss the artists presented in the slides in a group in order to analyze how art can show identity through silhouettes, Anchor standard 8.

3.      TLW use their knowledge about their person, character or object to experiment in shadow play and as a result, gain deeper empathy for their chosen identity, Anchor standard 10.

4.      TLW place their work on the tables for a gallery walk by the students to observe and discuss their processes, Anchor Standard 4.

Teacher Materials

Bed sheet strung up with string or other means, light source such as shop lamps, teacher example of shadow picture and any paintings, rubric on paper ( 1 copy for each student), computer with any cables needed, monitor, PowerPoint.
Demonstration materials: water-based oil paint, brushes, cotton rag, exact-o knife or scissors, cutting mat, cup for water, paint tray, 2 sheets gesseod heavy paper.

Student Materials

Paper of various types (should be newspaper and recycled Cardboard, Glue & masking tape, scissors & exact-o knives, cutting mat, pencils, smartphone camera, gesso and large brush to apply, plastic knives, note cards of any size. hot glue, cotton rags (1 per student), paint trays or paper plates, water cups, canvas already pre-gessoed, at least letter sized (8.5 x 11 in.), heavy duty paper of letter size or larger, water-based oil paints of various colors, brushes of many sizes and types including fine hair and bristle brushes.

Artists in context

Key Artists: Kara Walker, Moses Williams, Pablo Picasso, Augustine Edouart, Javier Tellez
Key Artworks:  Kara Walker, (video shown in launch), https://art21.org/watch/art-in-the-twenty-first-century/s2/kara-walker-in-season-2-of-art-in-the-twenty-first-century-2003-preview/
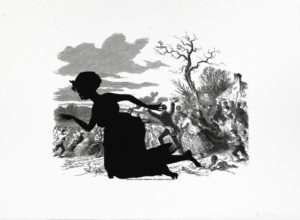
Walker

Walker Kara Walker, Alabama Loyalists Greeting the Federal Gun-Boats, from the portfolio Harper’s Pictorial History of the Civil War (Annotated), offset lithograph and screenprint on paper, 39 x 53 in., 2005.
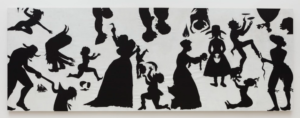
 

Walker

Kara Walker, Slaughter of the Innocents (They Might be Guilty of Something), 2017, cut paper on canvas, 79 x 220 in.
 

Tellez

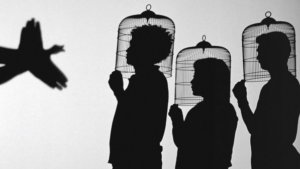
Javier Tellez, Shadow Play, 2014, still from 35 mm film, silent, 10 min, 56 sec.
 

Williams

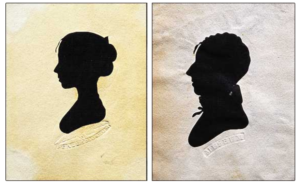
Moses Williams at the Charles Willson Peale Museum, cut paper glued on paper, 3.75 x 4.75 in.
Eduoart

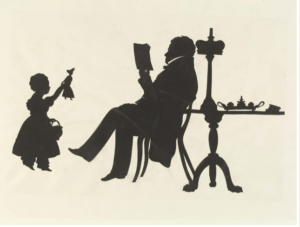
Augustin Eduoart, Wilkinson Family, 1829, cut paper glued on paper.
Picasso

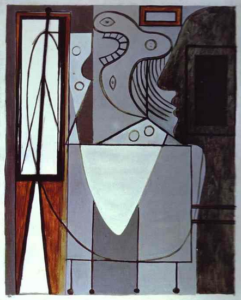
Pablo Picasso, Silhouette of Picasso and Young Girl Crying, oil on canvas, 1940.


teacher examples
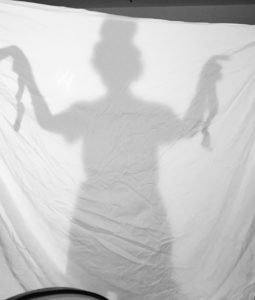
Example

Example of shadow photo of self as Minoan Snake Goddess, 2019.
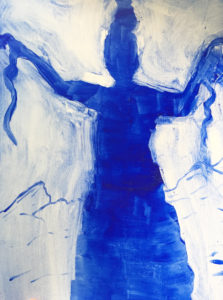
Example

Rub-out, water-based oil painting on gessoed paper of self as snake goddess, 2019, 8.5 x 11 in.
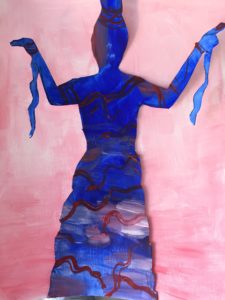
 

Example

Montage example on gessoed paper, glue, water based oils, 8.5 x 11 in., 2019

key critical questions

  1. How do Walker and Tellez play with identity in their work, specifically African American and immigrant identity?
  2. How does a silhouette capture the essential aspect of someone’s identity, or does it?
  3. How could you use objects or paper sculpture in your work to make a new identity that you have chosen?
  4. As in Picasso’s work, how does the context or background add meaning to the figure?

Vocabulary and language acquisition

Discipline Specific:
Form: three-dimensional shapes expressing length, width, and depth. Balls, cylinders, boxes, and pyramids are forms.
Space: is the area between and around objects. The space around objects is often called negative space; negative space has shape. Space can also refer to the feeling of depth. Real space is three-dimensional; in visual art, when we create the feeling or illusion of depth, we call it space.
Value: The lightness or darkness of tones or colors. White is the lightest value; black is the darkest. The value halfway between these extremes is called middle gray.
Contrast: A principle of art that refers to the arrangement of opposite elements (light vs. dark colors, rough vs. smooth textures, large vs. small shapes, etc.) in a piece so as to create visual interest.
Emphasis: is the part of the design that catches the viewer’s attention. Usually the artist will make one area stand out by contrasting it with other areas. The area could be different in size, color, texture, shape, etc.
Rub-out: In painting, this refers to the technique of applying a solid color of paint on a surface and then removing it in order to take out the light areas, while leaving the dark ones.
Edge quality: In painting, this refers to the quality of the boundary between the object and background or context of the piece. For example, it could be soft, hard, blurred, jagged or blended.
Atmosphere: a technique of rendering depth or distance in painting by modifying the tone or hue and distinctness of objects perceived as receding from the picture plane.

Academic:
Identity:
the fact of being who or what a person or thing is; a close similarity.
Silhouette: an image or design in a single hue and tone, most usually the popular 18th- and 19th-century cut or painted profile portraits done in black on white or the reverse. Silhouette also is any outline or sharp shadow of an object.
Montage: the technique of producing a new composite whole from fragments of pictures, text, or music.
Context: the circumstances that form the setting for an event, statement, or idea, and in terms of which it can be fully understood and assessed.

Language modes

Reading

  • Students will analyze a small amount of reading in PowerPoint and if they do research on their phones/computers.
  • Visual reading of images in slides, looking at content, style and meaning.

Writing

  • Writing the closure statements at the end of class.
  • Filling out rubric in a self-assessment with comments

Listening

  • Students will listen to each other during presentations and collaborative time.
  • Students will listen to the teacher during the introduction and demonstration of the lesson.Speaking
  • Students will respond to teacher’s and classmate’s questions and offer ideas during discussion time.
  • Students will respond to each other and ask questions when/ if they are confused or struggling during studio time.
  • Students will practice speaking in front of the class during presentations.

Accommodations for specific diverse learners

Enrichments and Extensions

  • Advanced students can research more specific information and images about their chosen person or character.
  • These students can also build more elaborate costumes or work with a partner to make a shadow tableau in tandem.

Activity for Early Finishers

  • Students who finish early can make the other option for the their painting; if they made a rub-out, they can do the cut out image or vice versa.
  • They can also make another sculptural costume to play around with in the light.
  • Students can write a short story paragraph about their new persona.

OBJECTIVE-DRIVEN ASSESSMENTS

Describe the tools/procedures that will be used in this unit to monitor students’ learning of the lesson objectives. Attach/paste a copy of the assessment and evaluation criteria/rubric at the end of the lesson where the assessment will take place.

  Objective # (s) Informal or Formal? Description of Assessment Modifications to Accommodate All Students Evaluation Criteria: What evidence of student learning related to the learning objectives and central focus does this assessment provide?


Anchor standard 2 Informal


Teacher will walk around room to see if students understand the two painting techniques as well as creating a costume in shadow play.   She will ask them questions to clarify if they seem confused. Teacher can supply modifications such as a sponge adapted to hold a brush or personally show them the technique again. This shows that by creating the two products: photo and painting of their choice, students understand the process of exploring shadow play in identity formation and making a connection to themselves through paint.
  Anchor standard 2 Formal (summative) TLW fill out a self-assessment rubric teacher provides and returns to teacher with comments. Teacher can read to the student and they can respond verbally or through a device. This shows that students can self-reflect on their process and share with another student or a teacher.
  Anchor standard 8 Informal TLW engage in a discussion with peers and teacher about how the artists shown in the slides play with identity in their art. Students can write on a paper if they do not feel comfortable sharing in front of the group. Provides immediate feedback to teacher based on the quality and depth of their answers regarding the topic.
  Anchor Standard 10 Informal Teacher will observe students at play in creating their personas in shadow play. Also, teacher will discuss with student about empathy for their person or object and how they can express these feelings in paint. Student can have a partner help them create their costume if they cannot construct it themselves. This shows that students are able to empathize with someone or something outside of themselves or allows another part of their personality to emerge.
  Anchor Standard 4 Informal Gallery walk when students are done creating their paintings and filling out of the note card with closure question. Students can be given more time to complete their painting at a later date if needed. Students can speak their answer to another student or teacher. Students are able to share their images and gain insight from discussing each other’s processes.

INSTRUCTIONAL STRATEGIES AND LEARNING TASKS

Launch Instruction Methods
  • What sub-big idea/theme is integral to this lesson? What Essential Questions could be used to engage curiosity and connection to the concepts?
  • How can art be used to convey ideas about identity?
  • How can you change your appearance with a material like paper to talk about a new persona for yourself?

Warm Up

1. Students will be given one piece of paper, scissors and tape and asked to alter their appearance somehow behind the screen with a light source. They can also use objects in the room. They will have more time to experiment with paper and objects later in the introduction (4 min.)

2. They will take turns going behind the screen and others can look. (1 min.)

  • Verbally
Instruction Instruction Methods
Procedure

Lesson Introduction: (15 min.)

3. Instructor will present the problem generally of how they can create a new identity behind the screen using their bodies and paper or object sculpture (found objects) and then using painting with a new background. They will be given two choices for the painting: rub-out and montage (cutting around their shadow form) and teacher explains she will give more information in a minute during the slides. (2 min.)

4. Slide presentation of short history of silhouettes and its relation to painting as well as the artists Kara Walker, Pablo Picasso, Javier Tellez, Augustin Edouart and Moses Williams. (5 min.)

5. Teacher presents the two techniques of rub-out and montage through a live demonstration. (3 min.)

Create: (60 min.)

6. Students will have time to work and assemble materials for the shadow portion. Students can do research on their phones online. Teacher will take a picture of students on the classroom iPad and print out images for them.

7. Using this photo, they will make a painting using one of the two techniques listed above. The rub-out will be on prepared canvas and the montage on a gessoed piece of paper. They must gesso this themselves if using this option. (Gesso dries in 5 minutes.)

Closure: (8 min.)

8. Students will display their work on their tables for peers to see in a gallery walk.

9. They will fill out the self-assessment circle rubric and hand back to the teacher with any comments that they added.

10. TLW write on a note card the closure question listed below and return to teacher after sharing with a peer.

Clean up: (7 min.)

11. Students will return materials to their proper places, clean and organized.

  • Verbal instructions then students start making costumes out of paper.
Structured Practice and Application
How will you give students the opportunity to practice so you can provide feedback? Opportunity for Independent Practice: Students can practice the rub out and montage techniques as teacher demonstrates and use the language as they work, asking questions.

Supplemental Texts: Books available in class: Hand Shadows by Henry Bursill; Stoichita, V. (1997). A Short History of the Shadow. London, UK: Reaktion Publishing.

Also available: https://www.incollect.com/articles/peales-museum-silhouettes & Kara Walker’s Art 21 video https://art21.org/watch/art-in-the-twenty-first-century/s2/kara-walker-in-stories-segment/

How will students apply what they have learned?
  • What problem is provided? In other words, what process and product are students being invited to do to create personal expression?
  • If you could be a different creature, person or object, what would you be and how can you explore this through shadow play and make a painting related to your experimentation?
  • Does role-playing and creating an image help you internalize or express empathy or see another aspect of yourself?
  • How can art be used to convey ideas about identity?
  • Students will play with identity formation through shadow play, take a picture and then use that image to make either a rub-out or a montage, thus connecting themselves to their experiences through their minds, hearts ad hands.
How will you determine if students are meeting your intended learning objectives? Assessment:

Formative: Teacher will circulate through the room observing students’ artwork to see if they understand the painting techniques and are playing with making a new persona in their shadow play, as well as see if they are making attempts as exploration of materials and concepts. Instructor will ask if they have any questions about the activity.

Summative: There will be a self-assessment through a rubric provided by teacher and attached to the end of this form, handed back to the teacher with any additional comments. Additionally, students fill out a note card with the answer to their closure question at the end of the activity: see “Lesson Closure.”


Closure Instruction Methods
Lesson Closure:   Students will write on a note card the answers to the following and return to the teacher:

  • What did you learn about yourself through the process of playing with shadow identity or painting that you could share with someone else in your class? Did you expand your ideas about how you, as an artist, can play with your persona through art? How so? Explain.
  • Verbal instructions to write on paper and turn and talk to another student.


Self-assessment Rubric

Please download the rubric here

TSuttonShadowRubric


References

Bursill, H. (1993). Hand Shadows. Kent, England: Pryor Publications.

Edouart, A. (1829). Silhouettes by Augustin Edouart. Spencer Alley. Retrieved from http://spenceralley.blogspot.com/2016/11/silhouettes-by-augustin-edouart-19th.html.

Kara Walker in stories. (2003, September 1). Art21. Retrieved https://art21.org/watch/art-in-the-twenty-first-century/s2/kara-walker-in-season-2-of-art-in-the-twenty-first-century-2003-preview/

Picasso, P. (1940). Silhouette of Picasso and young girl crying. Pablo Ruiz Picasso. [Website.] Retrieved from https://www.pablo-ruiz-picasso.net/work-193.php.

Root-Bernstein, R., & Root-Bernstein, M. (1999). Sparks of Genius. Boston, MA: Houghton Mifflen.

Silhouette. (2019). Encyclopedia Brittanica. Retrieved from https://www.britannica.com/art/silhouette.

Stichita, V. (1997). A Short History of the Shadow. London, UK: Reaktion Publishing.

Tellez, J. (2014). Shadow play. Peggy Guggenheim Museum. Retrieved from https://www.guggenheim.org/exhibition/javier-tellez-shadow-play.

Verplanck, A. (2012, October 16). Peales Museum silhouettes. Incollect. Retrieved from https://www.incollect.com/articles/peales-museum-silhouettes.

Walker, K. (2005). Alabama loyalists greeting the federal gun-boats, from the portfolio Harper’s Pictorial History of the Civil War (Annotated).  Retrieved from https://americanart.si.edu/artwork/alabama-loyalists-greeting-federal-gun-boats-portfolio-harpers-pictorial-history-civil-war.

Walker, K. (2014). Slaughter of the innocents (they might be guilty of something). Brooklyn Rail. Retrieved from https://brooklynrail.org/2017/10/artseen/Kara-Walker-and-the-New-History-Painting.

Woolfolk, A. (2019). Educational Psychology. 14th ed. New York, NY: Pearson.
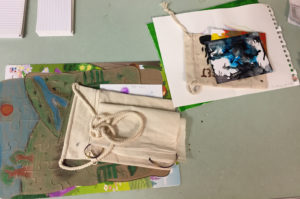


Solo Workshop — 3.07.19

Puzzling over Memory

Warm Up: Drawing from Memory

Warm Up: Drawing from Memory

A Student's Warm Up Piece

A Student’s Warm Up Piece

Warm Up Example

Warm Up Example

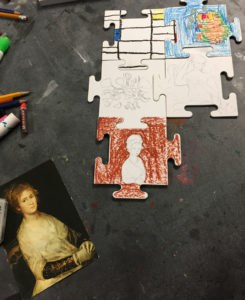
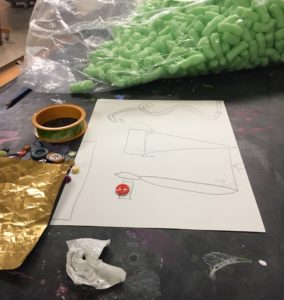
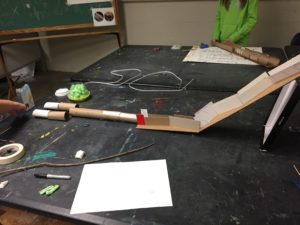
In the second workshop, I introduced the idea of the relationship between memory and the metaphor of a puzzle in a medium of choice such as painting or drawing with oil pastels.  The students started off with a warm up where they chose a postcard from a box with many intriguing art images, studied their picture for one minute, put it away and then drew or painted on a puzzle piece from their memory of the postcard.  After the slides of artists working with memory, I demonstrated painting techniques that applied to memory such as layering through glazing, scumbling, wet on wet and rub out.  They then made a painted or drawn memory on a pre-made puzzle on the back or by cutting their own puzzle on tagboard.  At the end, they gave it a title and we had a gallery walk to admire others’ work and give a positive comment.

Starting Little Moon

Starting Little Moon

Little Moon, Student's Piece

Little Moon, Student’s Piece

A Girl's Drawing of a School Experience

A Girl’s Drawing of a School Experience


A Beautiful Example of a Student's Memory

A Beautiful Example of a Student’s Memory

A kid's memory of an experience she had outdoors

A kid’s memory of an experience she had outdoors

Student Title: Freedom and the Ways to Find It.

Student Title: The Farm

_____________________________________________________________________________

Secondary Art Methods: Lesson 2
Tessa Sutton
Spring 2019

Title of the Workshop: Puzzling over Memory
Level or Course: Secondary (grades 7-12)
Time Needed: 90 minutes 

Overall Goals:
Big Ideas:
Exploring memory through sense perception, linking painting techniques to the concept of recollection, personal history, self-expression
Description & Purpose:
Working with a memory, how can you paint it similar to the characteristics of memory itself as something that appears and disappears, sticks in your mind, or is fragmented? How can the concept of the moving parts of a puzzle be related to your ideas of memory?
Importance:
Multitudes of artists have been engaged with the phenomenology of perception, including memory as part of human experience, through sense perception. Memory inherently involves time and personal history, experiences that lend themselves well to exploration through painting.
Art Concepts/Technical Skills:
Students will probe their memories and translate them into the medium of paint through the metaphor of a puzzle. Students can choose to paint their images before they create an abstraction of the pieces and cut the puzzle, or make the puzzle pieces before and then paint afterwards in order to play with the concepts and materials more thoroughly.

NAEA Standards:

  • Creating: Organize and develop artistic ideas and work, anchor standard #2.
  • Presenting: Convey meaning through the presentation of artistic work, anchor standard #6.
  • Responding: Interpret intent and meaning in artistic work, anchor standard #8.
  • Connecting: Synthesize and relate knowledge and personal experiences to make art, anchor standard #10.

Objectives:

  • TLW experiment with strategies to experiment with the form and metaphor of a handmade puzzle in relation to memory, anchor standard #2.
  • TLW develop a title for their piece to be viewed by peers in a display at the end of workshop, anchor standard #6.
  • TLW observe and critique artworks shown in the slides by drawing conclusions from the images and supporting these ideas in a discussion with peers, anchor standard #8.
  • TLW consider their personal phenomenology of memory and perception by exploring abstract and figurative images through paint, anchor standard #10.

Visuals:

Colter Jacobsen, pencil on paper, (no title).

Colter Jacobsen, pencil on paper, (no title).

Colter Jacobsen, graphite on paper, (no title).


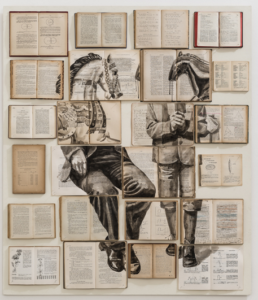
Ekaterina Panikanova, Errata Corrige #2, mixed media, 130 x 110 cm., 2012.

Ekaterina Panikanova, Pars Particularis, mixed media, 140 x 120 cm., 2014.


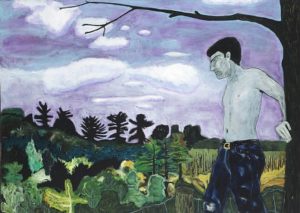
Peter Doig, At the Edge of Town, oil on canvas, 59.8 x 83.8 in., 1986-88.


Peter Doig, Fisherman Boys, archival print of his painting, 64 x 86 in., 2013.

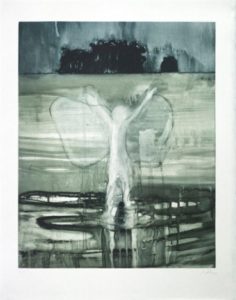
Peter Doig, Paragrand 2, aquatint etching, 20 x 16 in., 201


My Puzzle Example

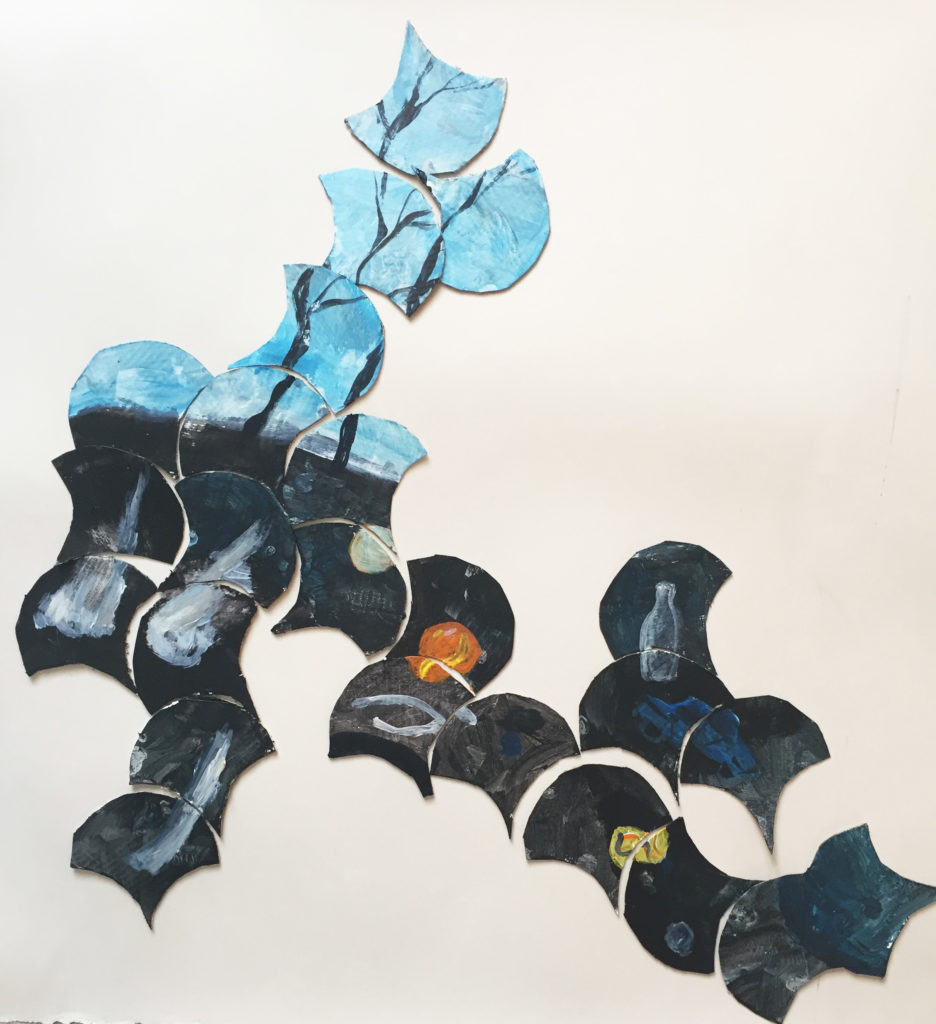
Teacher Example: Backyard Archaeology with Ginkgo Leaves, gesso, acrylic on tag board, dimensions variable, 2019.


Vocabulary:
Abstraction: the process of considering something independently of its associations, attributes, or concrete accompaniments.
Concealing: to place out of sight.
Depth: the degree of intensity going into space in a visual sense.
Fragmentation: the process or state of breaking or being broken into small or separate parts.
Glazing: a technique in painting where a layer of medium and paint are applied over another layer of paint that shows through; transparent paint layers.
Memory: the faculty by which the mind stores and remembers information or something remembered from the past; a recollection.
Perception: the ability to see, hear, or become aware of something through the senses; a way of regarding, understanding, or interpreting something; a mental impression; intuitive understanding and insight.
Phenomenology: Phenomenology is the study of structures of consciousness as experienced from the first-person point of view. The central structure of an experience is its intentionality, its being directed toward something, as it is an experience of or about some object.
Shape: the visible makeup characteristic of a particular item or kind of item.

Supplies, Materials and Resources Needed:
Book board or other semi-thick hardboard (1/8 inch or less), sample puzzle pieces, gesso, large brush for gesso, acrylic paint, gel medium, drawing paper, scissors, exact-o knives, tape, pencils, erasers, cutting mat, paint, trays, water cups, water from sink, brushes, paper towels, aprons if needed, newspapers, puzzle examples, a fan to dry to paintings, postcards, fan to dry paint.

Technology: Computer, monitor, HDMI or other cables to attach computer to monitor

TEACHING PROCEDURE PLAN
A. Launch: (Total 5 min.)
1. Students choose a postcard from a pile offered and study the image carefully for one minute. (30 seconds
2. After that minute, they hide the picture and try to paint as much as they remember on the teacher provided puzzle piece that has been gessoed, adding details especially and including any color. (4 min.)
3. Then they compare what they have drawn to the image on the card. This is to show them how visual memory is reconstructed through their senses when the object is removed from view, and how selective our memory is. (30 seconds)

B. Instruction or Demonstration with Problem: (Total 10 min.)
4. Students will be given manufactured puzzle pieces to play with and first think about the idea of memory in relation to this form and what it could mean and turn and talk with a partner about their ideas. (1 min.)
5. Teacher will explain that they will be making a puzzle about their memories and the various approaches they could possibly take such as painting their piece first, then cutting apart or playing with cutting shapes and then painting them afterwards. (1 min.)
6. While students are exploring, instructor will show slides of the artists Colter Jacobsen, Peter Doig and Ekaterina Panikanova, and discuss with them about how they create meaning under the concept of memory through materials and form. (5 min.)
7. Instructor will demonstrate scumbling (paint dragged loosely over the top with a bristle hair brush), layering through glazing (with gel medium), wet on wet and using a rag/paper towel in painting techniques to show how these can be part of their concept, such as layering, disappearance and fragmentation. (3 min.)
C. Create: (Total 65 min.)
8. Students will be informed of the location of materials in the room available to use and are free to ask to use other mediums. (1 min.)
9. TLW be asked to gesso their boards if they want to paint first and then cut it up. If they do not wish to paint first, they do not have to gesso until after they cut up the pieces. (1 min.)
10. TLW compose three thumbnails of size of their choice with paint or pencil, to think visually about their memory in possible puzzle shapes or just their image. (5 min.)
11. TLW create an image from one thumbnail (originally from a photograph or just in their mind for reference) and convey this through the paint and book board materials in some form of a puzzle. (53 min.)
12. Clean up will consist of students cleaning their areas and placing materials back where they belong. (5 min.)

D. Closure: (Total 10 min.)
13. In a final exhibition view, students will arrange their pieces on the tables along with their title and discuss the meaning of the work, share their process and determine what was successful among the work of their peers.

Questions to ask students to engage them in a discussion of their art:
“From the images in the slides, do you have new ideas or techniques about how to approach making your puzzle?”

“What part of memory do you want to talk about? Is it the fleeting sense of it, the presence of someone or maybe the brightness of the colors?”

“What painting techniques can you use to feel out your memory?”

“Did you discover anything about the concept of memory and how you made it?”
“How old were you in your memory and how did that feel? What were you doing?”

Rubric/Assessments/Evaluation/Feedback:
Formative/Informal:
Questions:
“How will you tie together the puzzle shapes with your image? How do they connect?”

“Does your painting technique change from your first idea to when you started making it?”

“What title will you use in your piece and how does it relate to the idea of a puzzle or how you painted it?”

“Are you letting yourself play with the materials before you begin your final piece? Maybe your final piece is just playing with fragments?”

Observations:
Teacher will circulate around the room and see if students are experimenting with puzzle shapes and images together. Teacher will also see if they understand how painting techniques can affect the meaning of their memory.

Summative/Formal:
Students will discuss their work in a final display after titling their pieces and placing them on tables for others to observe and discuss. They will talk about how their techniques and materials influenced their resulting memory piece as well as their material and conceptual process.

Accommodations, Enrichments & Extensions:
Students who may have difficulty with this lesson:
Accommodations can be made for students who have trouble holding or grasping materials by creating a sponge for them to put their brush or pencil inside of. Anyone who needs assistance with exact-o knives can be aided. People who have difficulty cutting can use pre-made puzzle shapes given by the instructor. Students who are hard of hearing may sit nearer to the instructors as well as sight impaired students. Presentations will have large font for people at the back to see clearly.

Advanced Learners:
Students can make more complex shapes or 3-D puzzles that they construct through experimentation.
Students who finish early:
Students can play with their puzzles and share with others who are also finished. They can also make a smaller, second puzzle.

References:
Barthes, R. (1980, 2000). Camera Lucida. Vintage Classics, Random House: London, UK.
Doig, P. (1988, 2013). At the edge of town; Paragrand 2; Fisherman Boys. Artnet.
       Retrieved from www.artnet.com/artists/peter-doig/.
Jacobsen, C. (2019). Colter Jacobsen. [Website]. Retrieved from        https://www.colterjacobsen.com.
Merleau-Ponty, M. (1964). The Primacy of Perception. Evanston, IL: Northwestern University.
Panikanova, E. (2012). Errata corriga #2; Pars particularis.  Sara Zanin Gallery.
       Retrieved from http://www.z2ogalleria.it/ekaterina-panikanova/.
Sebald, W.G. (2001, 2011). Austerlitz. Random House: New York, NY.

Collaborative Workshop — 2.21.19

Wishing in the Well of Subconscious Drawing

A student's experiment with pareidolia

A student’s experiment with pareidolia in acrylic

A student's image with alcohol ink

A student’s image with alcohol ink


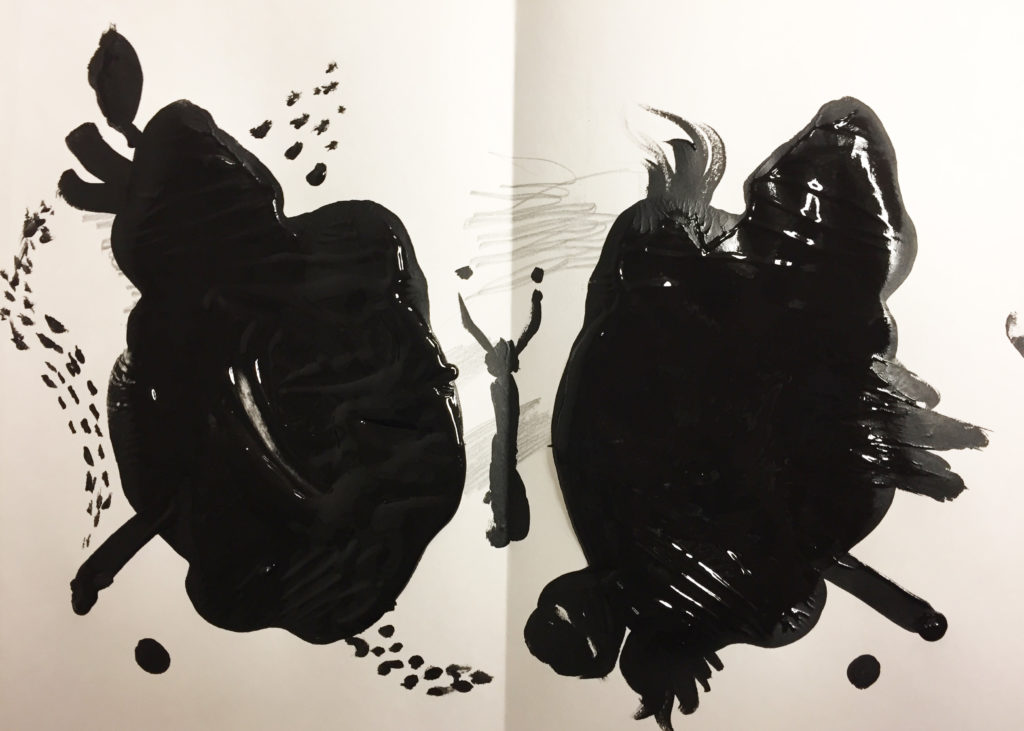
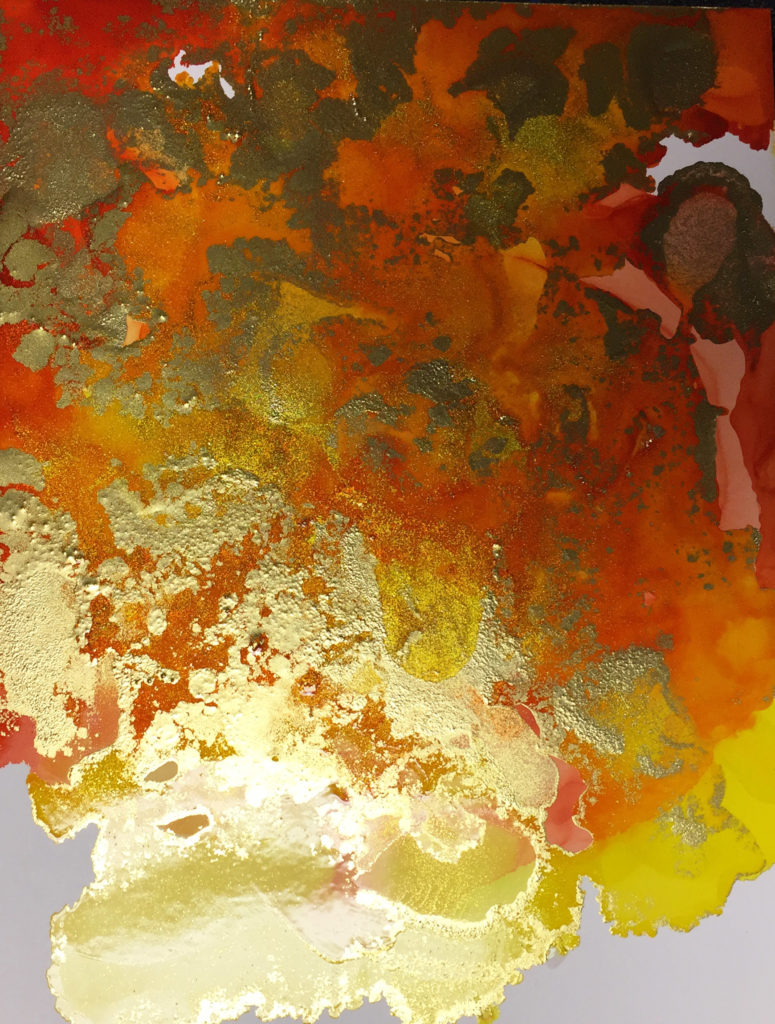
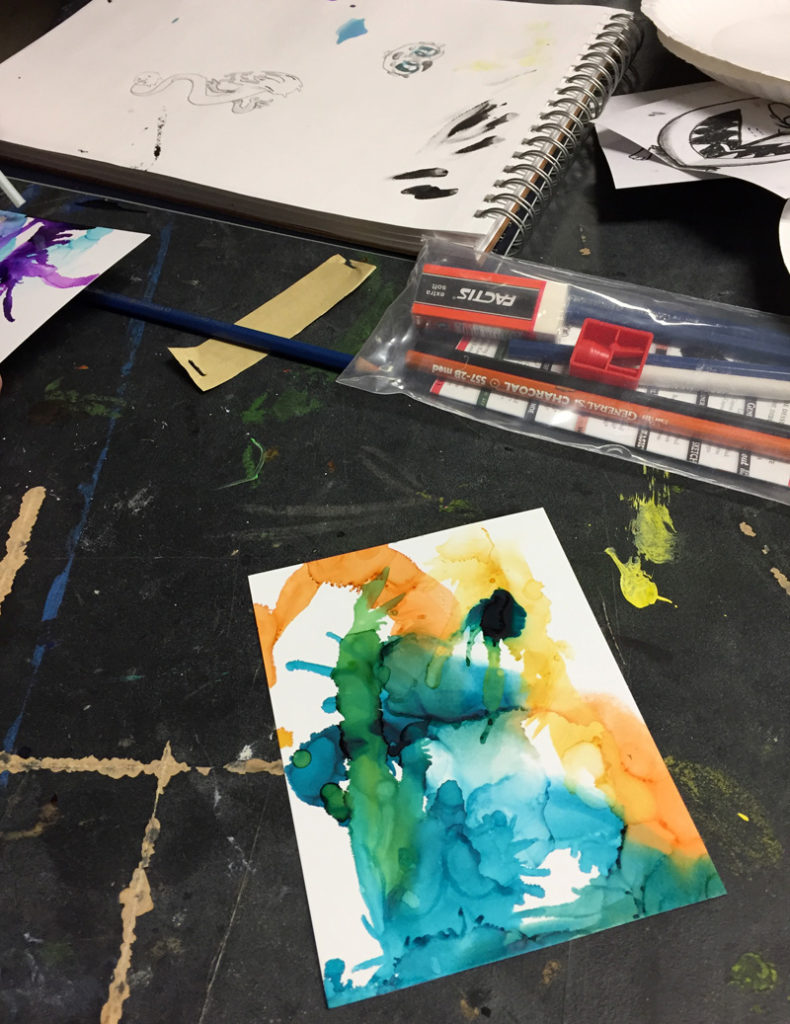
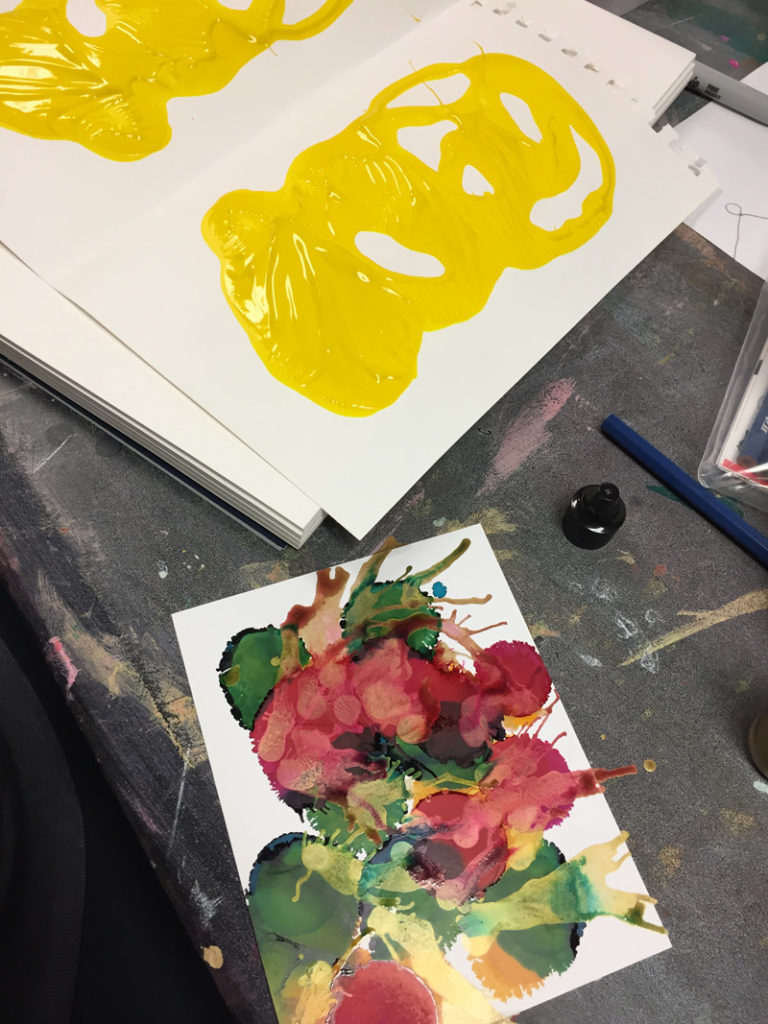
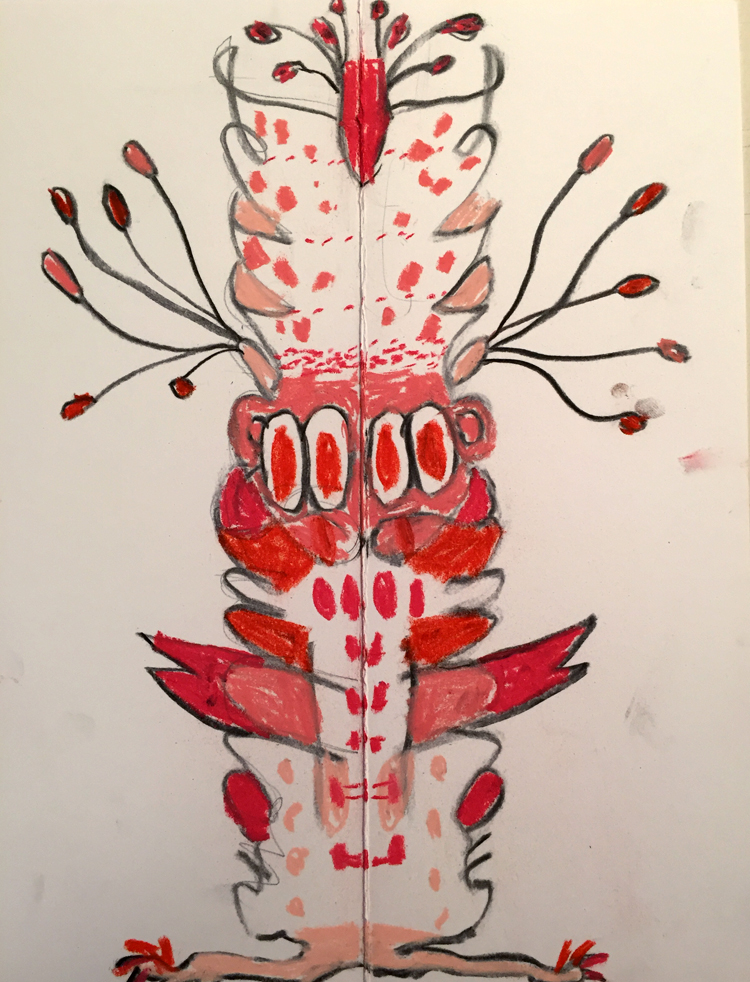
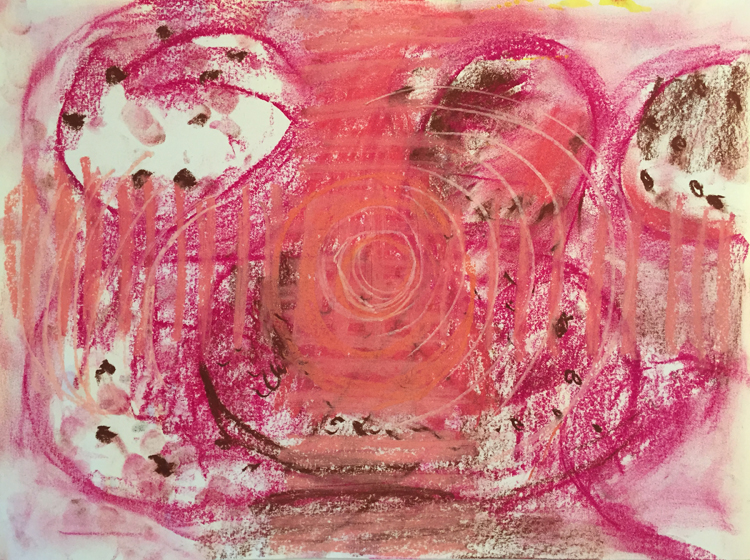
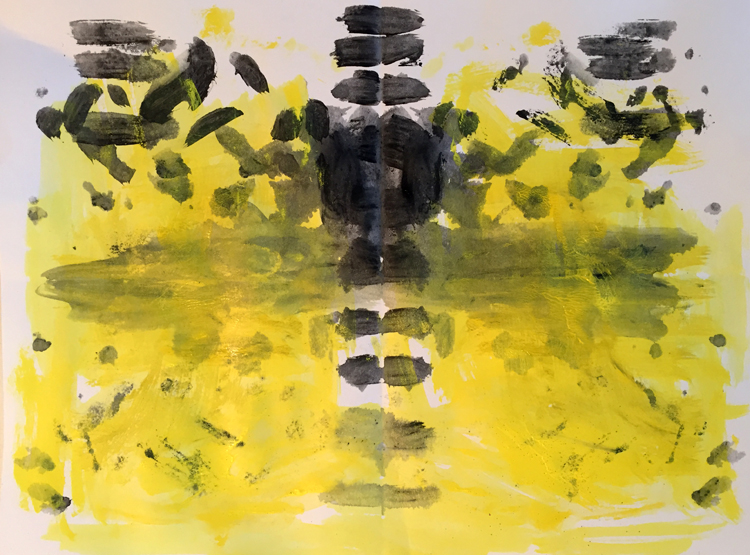
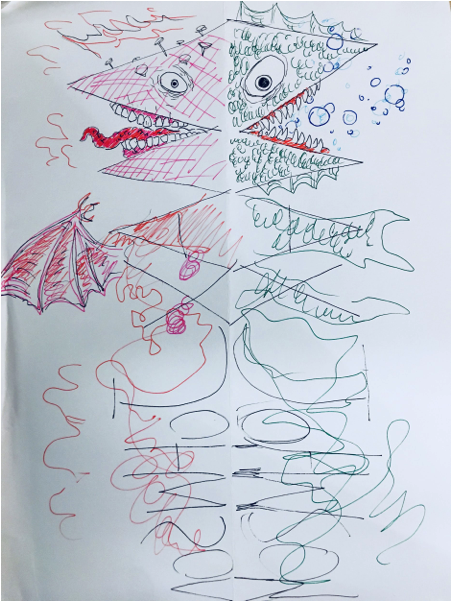
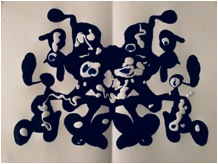
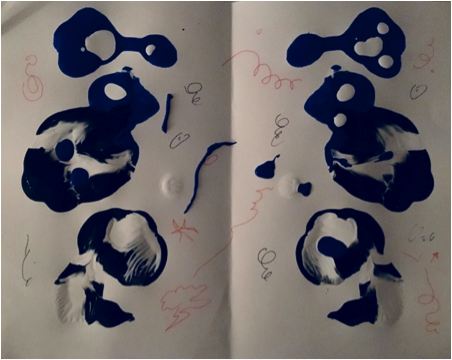
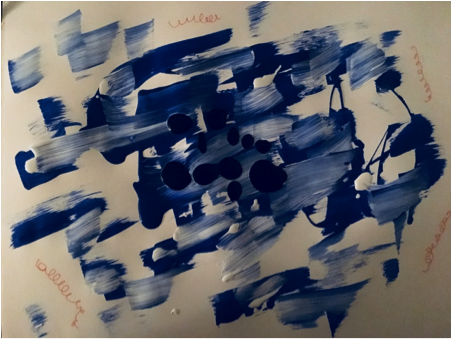
For our first collaborative workshop, Max and I came up with an activity inviting the students to explore pareidolia, automatism and the subconscious through making a creature name drawing out of the letters of their name as a warm-up, then experimenting with doodling techniques, textured rubbing drawings, Rorschach painting with acrylic or watercolor, and alcohol inks.  After playing with each of these while we were demonstrating and showing the slides with artists’ work with the overall concept, they formed images about their wishes and dreams through abstractions in a choice of mediums. At the end, we had them write a positive statement about someone else’s drawing, walk around looking and place it next to that work.

A student's beautiful drawing with inks

A student’s beautiful drawing with inks

A student at work

A student at work

Another playing with inks and pareidolia

Another playing with inks and pareidolia


Tessa Sutton & Max Johnson
Secondary Art Methods
Spring 2019

Title of the Workshop: Wishing in the Well of Subconscious Drawing             
Level or Course: Secondary (grades 7-12)
Time Needed: 90 minutes
Workshop Overview/Goals:

This first meeting with the students enables us to get to know their personalities, interests and play abilities in order to create the next activities through a monster name drawing and then experimenting with their wishes and dreams through the process of playing with drawing materials to show their concerns.  Students can learn each other’s names as they play with drawing a monster, using lettering as an imaginative starting point. This builds a positive studio environment.

Techniques to explore include automatism (including rubbing objects for texture), instances of pareidolia and various ways to doodle.  By experimenting with the concept of wishes and dreams using doodling and surrealist techniques, they can translate their ideas into abstraction. Teaching artists will show examples of their artwork and two artists who inspire them to get the students to know them and understand that the workshops are collaborative between student and teacher.

NAEA Standards:
Creating: Generate and conceptualize artistic ideas and work, Anchor standard #1.
Performing: Convey meaning through the presentation of artistic work, Anchor standard #6.
Responding: Interpret intent and meaning in artistic work, Anchor standard #8.
Connecting: Relate artistic ideas and work with societal, cultural, and historical context to deepen understanding, Anchor standard #11.

Objectives:
TLW create a monster name and wish drawings through experimenting with pareidolia, automatism and doodling techniques using abstraction. Anchor standard #1.
TLW explain, interpret and communicate their ideas to peers through their drawings in the gallery walk. Anchor standard #6.
TLW generate, analyze and interpret meanings in their own work through looking and discussing presented artists’ work. Anchor standard #8.
TLW connect their ideas and work with artwork viewed in the slides presented to place them in a context. Anchor standard #11.

Visuals:

All are in PowerPoint or available to see in class in book form.


Yoko Ono

Excerpts from Yoko Ono’s, Acorn, 2013, book

Max Ernst, Forest and Dove, 1927, oil on canvas, 100 x 82 cm.

Shawn Thornton, Witch Doctors at The Eye of The Solar Epoch, 2010, oil on panel, 12 x 29 in.

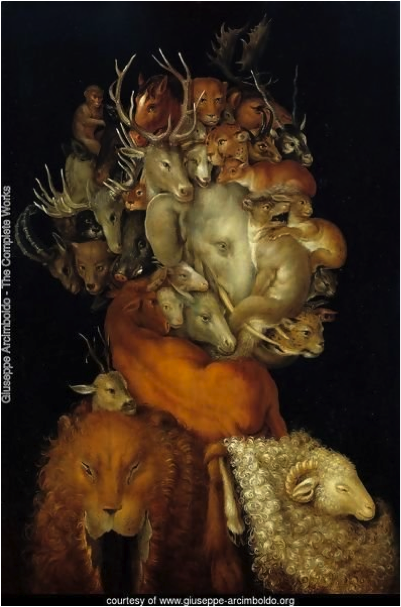
Giuseppe Archimboldo, Earth, 1566, oil on wood, 70 x 48.5 cm.

Dana Donaty, Jumpin’ Jack Flash, 2015, acrylic on canvas, 48 x 90 in.

Teacher Examples:

Tessa:

Monster Name Drawing

Monster Name Drawing: charcoal and pastel on paper


Wish Drawing 1: chalk pastel on paper


Wish Drawing 2: acrylic paint on paper


Acrylic paint and pencil on paper


Max:

Name Drawing: pen on paper

Dream Drawings 1, 2, and 3: acrylic and pen on paper


Vocabulary:
Abstract: a representation of an idea, but not really having a concrete or recognizable form to interpret.
Pareidolia: visual stimulus, causes humans to apply familiar, often human features, to things that in reality don’t have them, such as viewing an electrical socket as a face.
Automatism: the avoidance of conscious intention in producing works of art, especially by using mechanical techniques or subconscious associations.
Space: an element of art that refers to the areas around, between, and within components of a piece. Types of space: negative and positive, deep and shallow, and two-dimensional and three-dimensional space.
Line: line is an art element which is often used to form shapes and separate space.
Subconscious: a part of an individual’s mind which we generally are not aware of, but the subconscious can have influence on our actions and feelings.

Supplies, Materials and Resources Needed:
Materials: drawing paper, post-its, pencils, colored pencils, watercolor, oil and chalk pastels, erasers, water cups, paint trays, brushes, string, sharpies, alcohol inks, alcohol, eye droppers,
5 x 7 in. note cards
Technology: Computer, monitor, HDMI or other cables to attach computer to monitor

Teaching Procedure Plan:

Launch:
1. Monster Name Drawing. Students will be invited to create mirrored images of their names on folded “hot-dog” paper. Using the lines of their names, they will use pareidolia to see monsters or creatures and bring them to life using drawing mediums of their choice (10 min.)

2. Teachers will circulate and see if we can read their names and ask them about their creatures. (5 min)

3. Introduce ourselves, show images of our work and talk about our interests, showing two artists that we both like (5 min. total).

4. Pass out survey and activity ranking sheet and chat about these. Ask if they have other ideas and explain to students we are interested in their ideas and there is a space in the ranking sheet for other suggestions that they might have (5 min.).

Instruction or Demonstration with Problem:  

5. Show Yoko Ono’s, Acorn, book. Students can look at the slides instructors show on wishes/dreams involving automatism, doodling and pareidolia. Explain that we would like them to explore their dreams and wishes on paper or materials of their choice using abstract images (5 min.).

6. Short demonstration of folding paper with ink to create a rorschach, rubbing to create texture, using string and watercolor, doodling to build layering, adding shapes and using alcohol inks (5 min.).

Create:

7. Students will be made aware of where the materials are located (in easy to access locations with labels of the materials) and how they can get these on their own.  They will obtain any materials they need after the demonstration (5 min.).

8. TLW explore abstract images made by pareidolia with alcohol inks, pen and ink, ink, pencil, colored pencil, folding the paper, using string to make shapes.  Show some handouts on doodling that may help them. Ask if they have questions. Students will be encouraged to experiment with more than one technique and layering of them (35 min.).

9. Clean up time will be announced 5 minutes before the closure period and students informed of where the sink is located and where to place supplies (5 min.).

Closure:
Closure involves the summative assessment gallery walk as described below (5 min.).

Questions to ask students to engage them in a discussion of their art:
How can you show your wish without using figurative images?
What would they wish for themselves, other people, the world?
How do you explore dreams using abstraction by experimenting?
How can you abstract a concrete idea?
Can we make sense of our dreams through exploring them visually?

Rubric/Assessments/Evaluation/Feedback:

Formative:
Questions:

What sort of wishes/dreams did the students focus on? Good or bad dreams and for who?
Did students make use of the wide range of materials at their disposal and draw from the artists’ examples?
Which students seemed stumped by the activity? What kind of questions did they ask to help clarify the activity?
How did the students explain and/or represent their dream/wish through the abstract medium?
How willing where the students to open up about wishes and dreams to peers and to us instructors?
Did the students seem interested in the concepts of dreams and wishes? What about exploring pareidolia?

Observations:

Teacher will look at the types of shapes the students latched onto, explored and see how invested the students are in the activity.  Instructor will listen to questions and observations the students make before, during, and after the activity to check for understanding.

Summative:  

Students will do a gallery walk at the end of the session and place post-it notes near each student’s work explaining PCP comments (positive, constructive, positive).  We will then go around and discuss how they thought these pieces were successful and share insights into their processes (5 min.).

Accommodations, Enrichments & Extensions:
Students who may have difficulty with this lesson:
Accommodations can be made for students who have trouble holding or grasping materials by creating a sponge for them to put their brush or pencil inside of.  Additionally, students who have difficulty grasping making an abstract interpretation may draw a representational piece. Students who are hard of hearing may sit nearer to the instructors as well as sight impaired students. Presentations will have large font for people at the back to see clearly.

Advanced Learners:
Does the context where you place your wish have any relationship to how you made your wish? Research one way in depth how people made wishes in certain locations in mythology or history.
Students who finish early:
These students can construct another drawing using a second method of their choice that they haven’t tried.

References:

Arcimboldo, G. (1566) Earth. Retrieved from  
          https://www.wikiart.org/en/giuseppe-arcimboldo/earth-1570.
Dodson, B. (2007). Keys to Drawing with Imagination. Cincinnati, OH: North Light Books.
Donaty, D. (2015). Jumpin’ Jack Flash. Retrieved from https://www.danadonatyfineart.com
/fullscreen-page/comp-jnniusff/5bce311b-a96f-4e54-927c-3d5f9cb440c1
/6/%3Fi%3D6%26p%3Davzys%26s%3Dstyle-jnniusg51
.
O’Connell, R. (2014, November 11). How we came to make wishes on these 11 things. Mental Floss.  Retrieved from http://mentalfloss.com/article/59991/how-we-came-make-wishes-t
these-11-things
.
Ono, Y. (2013). Acorn. Chapel Hill, NC: Algonquin Books.
Tate Modern. (2019). Automatism. Retrieved from https://www.tate.org.uk/art/art-terms/a
/automatism
.
Thornton, S. (2010). Witch Doctors at The Eye of The Solar Epoch. Retrieved from  
            https://shawnthorntonpainting.com/section/422233-Painting.html.


Saturday Art Workshops — 11.3.18

Designing Dream Houses and considering the environment

Starting the floors

Starting the floors

This week I taught the concept of dream houses, where students can make floor plans of their buildings and construct at least one floor in 3-D. We only had one student this week, so she got extra attention from both of us. After starting with the opening ceremony, asking what she did that was creative this week, I explained that she would be making a dream house that could be for humans, animals or other beings. I wanted her to consider the environment and context for her house. Would it be communal or solitary? Who would live there and how would you consider the area around the house as affecting the design and function of the place? Then I showed my examples and emphasized how people would move from one room to another as well as energy uses in the house. After, I showed some slides about Erwin Wurm’s, Fat House in Vienna, the fanciful, automaton, Hellbrunn Castle in Germany, and communal experiment, Arcosanti in Arizona.

Starting the floor plan

Starting the floor plan

Originally in the lesson, I wanted students to write a story or narrative about their design for the viewer in the later exhibition we would have at the end, but since there was only one student, I let her spend more time on her 3-D piece because her usual buddy was absent today, so there was some time spent in focusing her actions. She might be there next week when she can completely finish her project and do the writing and exhibiting. She spent a good amount of time on the sketch, which I was surprised by, because in the other classes they all seemed to want to jump into 3-D instead of the drawing part. She made a great drawing and added details like a movie room and a special bedroom for her mom. I explained how to add symbols for doors and windows that architects use including labeling the floor plans.

I’m trying to focus on enjoying the act of teaching more; since there is so much prep time, sometimes you can lose focus on the actual teaching. In Michael Linsin’s, Classroom Management for Art, Music and PE Teachers, he talks about developing a love for teaching that affects student motivation and the artwork produced. If you love your lessons and are excited about imparting them, the students will be better engaged and behaved. Part of this requires knowing the interests of your students and giving choices as motivational factors. Knowing what excites them can give your lessons a lot of life.

Recycled materials to use for 3-D work

Recycled materials to use for 3-D work

Floor plan of one student

Floor plan of one student

Overall, I think this lesson was successful because the student made a complete product of a floor plan in 2-D and 3-D, considering the location and inhabitants of the house. I used formative assessment as the main tool during this activity since there was only one student, asking her questions about the considerations for her piece. I think in the future, I would also emphasize scale more, especially with older students and add in a math component using rulers. One final part to consider is if students want to use entire boxes, like she did, these lessons might require another class period. If they were just building one floor, it would take less time. Had she finished her story in time, this would have been a nice example of Stephanie Juno’s chapter in Artful Teaching, that describes “making learning visible” through additional artifacts of the process and accompanying text to help explain what she learned in the activity.


Working on the final piece

Working on the final piece

Final piece

Final piece

Saturday Art Workshops — 10.27.18

Rube Goldberg Machines with colleen

A machine that paints

A machine that paints

This week I helped out during Colleen’s lesson on Rube Goldberg machines. She started off by showing them Ok-Go videos and images of his sketches to get them intrigued and “get the ball rolling.” She engaged them by asking questions about Mousetrap the game and if they’ve ever heard of Goldberg or seen his inventions. We had two girls this week since one student was absent, and they really loved collaborating together at the beginning during the brainstorming session, and then ended up making two distinct machines.

Brainstorming drawings

Brainstorming drawings

Colleen instructed them to draw out their sketches and spent time talking with them about what machines they could invent such as ones for nail polish painting, applying make up and I added in some ideas as well. She showed them her 3-D example and told them they could make a machine that actually works or not.

The kids played around with the recycled materials as they were brainstorming to get their brains and hands moving which helped them generate ideas.

The trash cleaner machine

The trash cleaner machine

They surprised me by constructing really large machines that went from ceiling to table or table to floor. It was a physical process they were involved in and enjoyed being a part of. She also used a pop quiz with them towards the end and asked if they remembered the artist’s name we looked at as a kind of formative assessment.


Working on the machine

Working on the machine

Overall, this lesson was successful because she had materials prepared and organized, images for them to look over and discuss, an example which helped them visualize a possible machine, and engaged kids who produced well constructed and clear machines with an input and output.


Saturday Art Workshops — 10.20.18

Geological Abstractions

Observation of agate and sodalite

Observation of agate and sodalite

Observation of agates

Observation of agates

Observation of sodalite

Observation of sodalite

This week I taught a lesson where students observed and painted patterns and colors of rock samples that I borrowed from the geo-science department here at the University of Iowa. This lesson links geo-science with art, through the observation of crystals and minerals under a digital microscope where students enlarged sections with a partner or alone, and made a bigger, imaginary mineral formed through paint layering. Students learned about the types of minerals including metamorphic, sedimentary and igneous and how these are formed by viewing a PowerPoint.

Using analogous thinking, they used layering and the idea of structures and coloration as experimental methods to make abstract art, interconnecting the process of forming rocks with ways of painting. The observation part was interesting to me because as 4th and 5th graders, they’re moving into Lowenfeld’s pseudo-naturalistic stage of art and away from a more schematic stage, increasing detail and making things look as they are in reality.

Observation in process

Observation in process

Some rock examples

Some rock samples: one is even from the Earth’s mantle

I started off the lesson in our opening ceremony asking them what they did this week that was creative, then launched into asking them questions about different types of rocks and if they had a collection, to get them engaged. I spread the rocks out on the table with magnifying glasses, so when they came in, they had something to explore. From the last lesson I learned to keep the materials at bay until I had explained the lesson, gone over the slides and quizzed them about types of rocks. This was more successful. According to Michael Linsin in “Classroom Management for Art, Music, and PE Teachers,” if you give clear directions to students to start with, then there is less confusion.

Painting a mineral

Painting a mineral

I asked them if they had any questions about the activity and then demonstrated scumbling and under painting, including using sandpaper. I explained how they would make two circles on paper using a roll of masking tape and then using the digital microscope, take a picture of their stone. After each one had taken a picture, I put the three images up on the computer so they could all see them. I think in a full class of students, I would have a few kids use the microscope and then enlarge on the projector so everyone could see and choose one.

"Killer Bunny"

“Killer Bunny”

"I Have Homework"

“I Have Homework”

"Rainbow Rock"

“Rainbow Rock”

They completed their two small observation paintings and two chose to work together and one alone. After they finished drawing a circle on the large heavy, duty paper with a string attached to a pencil with tape, I explained to them that they would enlarge their small drawing by choosing either the pattern or the color as a starting point for their new rock. This seemed to go well and once they had paint in hand with a roller and brush it flowed out, in fact, too much. One group used a lot of paint, however, so next time I will mention to use paint sparingly. Together, we scraped some paint off the work.

Collaborating

Collaborating

Two girls completed both paintings together, and they came up with the ideas for the color and application as a team. They also asked themselves the question, “When is this finished?” which was great because I was going to pose that. Their response was: art is never finished and then I said you can both decide together when that moment is, based on what you want it to look like.

The other student finished her painting early and decided to free draw and work on her batik from a previous class as a sponge activity. Pacing seems to be variable, like in the other classes.

Working on "Rainbow Rock"

Working on “Rainbow Rock”

In “Formative Assessment in the Visual Arts,” Andrade, Hefferen and Palma talk about collaborative assessment that peers can do for each other as a useful tool. These two students played together with techniques, deciding what was working and what wasn’t. At the end, I had them write their title on a post-it note and place next to the paintings in the gallery walk. Each student talked about why they thought their piece was successful and how they started the process. Using this kind of self-assessment is helpful for all of us because they explain to other students what they are learning and the teacher knows too.

Overall, this lesson went well because the students were engaged in honing their observation skills, experimenting with new painting techniques, collaborating if they chose to, and displaying their pieces for their peers using an inventive title. They also learned more about rocks and minerals, so this lesson could tie into earth science in 4th and 5th grade.

Teacher Examples:

"Spacelite"

“Spacelite”


Observation Examples

Observation Examples

Saturday Art Workshops — 10.13.18

Colleen’s screen printing Logos with Stencils

A logo stencil printed on a bag

A logo stencil printed on a bag

This week I observed and helped out in Colleen’s lesson on screen printing logos for invented organizations using stencils on paper. It was great to see she had materials on hand for them to make bandannas, t-shirts or a canvas bag if they wanted those. She started off by asking them about their creative activities this week during the opening ceremony that we have been doing. This got them engaged and was a nice transition into thinking about designing a logo while she showed her example stencil. She showed them the PowerPoint of various logos and asked them to interpret those. After that, she provided an informal assessment of their prior knowledge by quizzing them on semi-blank logos with parts missing, asking them to pare down to the essentials when they make their drawings for their logos. She requested that they make three sketches to start. One student groaned a bit but it was good for that kid to slow down a bit and think through her ideas more.

A logo stencil ready to print

A logo stencil ready to print

A logo about acting

A logo about acting

Putting ink on the screens

Putting ink on the screens

Applying the squeegee

Applying the squeegee

A kid's bandanna

A kid’s bandanna


After the sketches were approved and suggestions made, Colleen showed them how to screen print with her stencil in a demonstration. I thought the pacing of this lesson was successful for her in terms of how she introduced the idea and the parts of the activity. She also explained to them how to be safe while using an exact-o blade, which for 4th grade, can be tricky. They seemed to understand how the color would only be applied to the spaces that they cut out, so they had an idea already about negative and positive space and worked it out while they were making it. The collaborative aspect of requiring a partner to assist in holding the screen while another prints is a nice way to build community. One student had an issue with matching the squeegee size with the screen and so she had a limitation in material, but she solved the problem by just turning the squeegee so it fit better, which is part of the process of making art; the mistakes can either be helpful or a hindrance.

Overall this lesson was a success because the students were engaged, developed their ideas more fully through brainstorming and made productive results. The students have a good rapport with Colleen and each other as well.

Saturday Art Workshops — 10.6.18

designing Reverse Time Capsules

This week in the Saturday Art Workshop, I taught Reverse Time Capsules which were containers from the future that people had time traveled to the present to leave behind for contemporary folks to find. I gave them the handout and explained that I wanted them to make three pieces to go inside the capsule, such as an artwork from the future, a solution to an ecological problem, a science or medical invention, a new type of building, or the X factor, which was something of their choice. The kids seemed to pick up on this idea faster than I thought they would.

In process

In process

I started off asking them what they knew about time capsules and one said that they just opened one at her school from 100 years ago which was really neat. Then I showed them some of my examples and they got so excited that they just got up and started grabbing cardboard and model magic. I quickly showed them the art materials and wrangled them back into the PowerPoint, which was short. I felt like I had the reins to a wild horse. I realized afterwards that I shouldn’t have shown them my examples right away; I should have waited until after the images because I tried to get them to brainstorm but they just didn’t want to after they had seen the materials and had too much model magic in hand. One thing I could have done is given each a small piece of clay and a piece of paper as we were talking and then they could have brainstormed in 2-D and 3-D. One question I have is what do you do when kids really don’t want to brainstorm or do part of an activity? Do you leave it by the side of the road and just go with what they are interested in?

Final touches in the mini museum

Final touches on the mini museum

Making the time capsule container

Making the time capsule container

The pacing also seemed different this time, although we had other kids because the regular ones were absent. The girl who usually finishes early spent so much time on her box that she only made one future animal and its clothing, but it looked good. Another boy ended early so I had him work on making his mini museum with titles, which is what they all did at the end. It gave them a chance to talk about their art so their peers could comment. Overall I think the timing went pretty well for a 90-minute activity and each one had a completely different capsule shape and ideas. One kid made a car that made tornadoes and a future animal that was similar to a worm that lived in the jungle; another made a bucket that saves water and a place for storing energy.

Another question I have is how do you get kids to explore their ideas more before just steamrolling ahead with what they have planned? It seemed like most of them knew exactly what they wanted to do before they considered too many options. It’s positive in the sense that they are strong-willed but how do you get them to brainstorm and play more before making decisions?

Tornado car

Tornado car

A future animal with clothes

A future animal with clothes


The mini museum

The mini museum

Teacher examples:

Pyramid time capsule

Pyramid time capsule

Underwater city, cure for cancer and tree seeds

Underwater city, cure for cancer and tree seeds