Fringe Benefits: Subversion in Weaving & Fibers

redesigning the american flag including territories

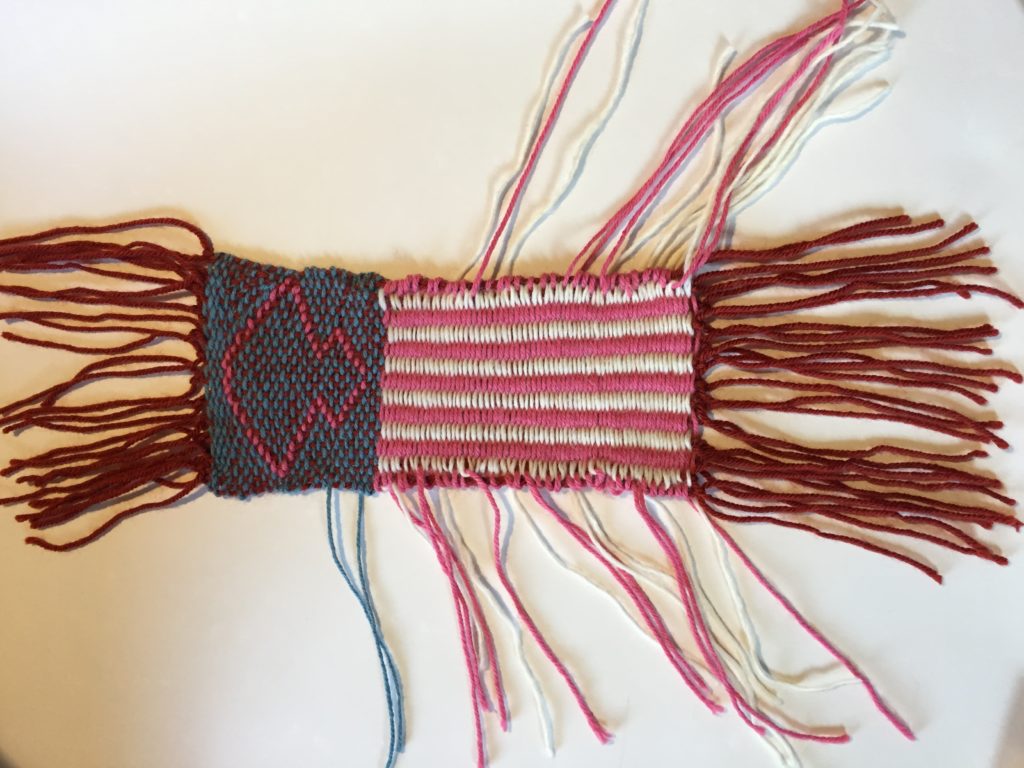
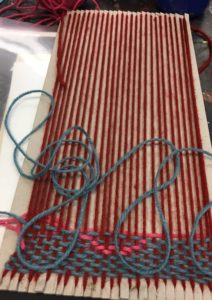
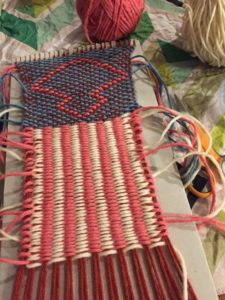
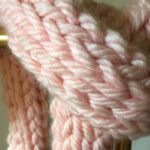
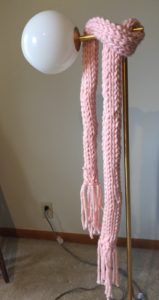
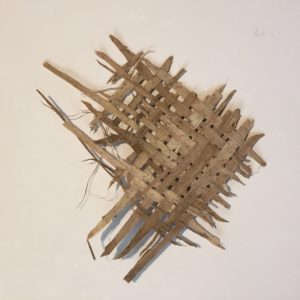
Weaving is a very calming and meditative process that helps relieve the monkey mind of its chatter.  After a long day at school, I’ve found this to be soothing.  Starting on a piece of tag board, I wrapped the yarns into the notches for the warp.  Then I began with the colors of the weft.  I added 55 pink stitches for symbols of the 50 states and the 5 territories.  You know the ones: Guam, Virgin Islands, Puerto Rico, American Samoa, and the Northern Mariana Islands.  These people pay taxes and might get a “representative” in the House that  can’t vote for laws, just observe.  There are about 4 million people who can’t vote in the presidential election. John Oliver explains: https://www.youtube.com/watch?time_continue=20&v=CesHr99ezWE.

I left the fringe long on the bottom and wanted it to look like it was unraveling so I didn’t tie the sides.  America is a work in progress…1

FInal piece

Final piece: America and the Fringes

Showing the warp

Showing the warp

In process

In process


other weaving: the ripple effect

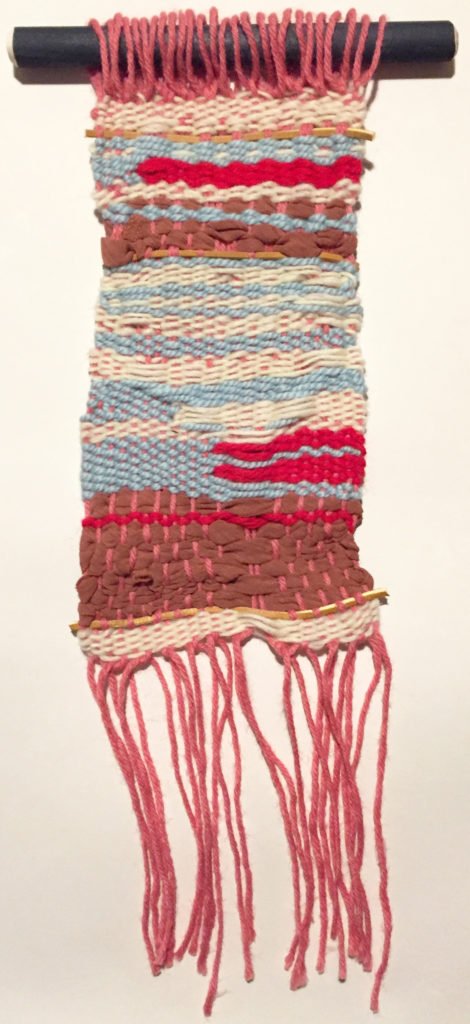
I started this piece after the one above after thinking about small changes we make in our everyday lives can become waves through other people and collective events.

The Ripple Effect

The Ripple Effect (hung on painted wooden dowel)

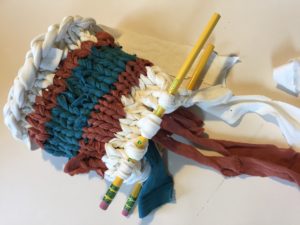
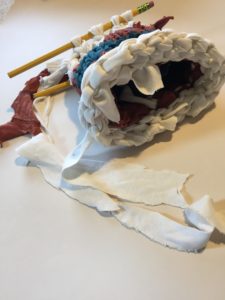
knitting a nest out of t-shirt Yarn on hand

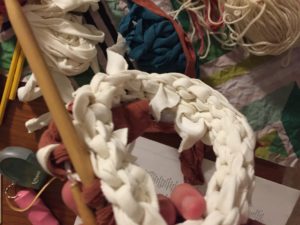
I enjoy making t-shirt yarn as an avid knitter who likes to experiment with different materials. For this nest, I cut up three t-shirts that were somewhat old and the colors faded. Then, I knitted it on circular needles for chunky yarn, leaving a hole open at the bottom.

I left this nest of America unfinished on purpose, as things are always unraveling and being rebuilt in this country and the comfort one can find here shifts to become discomfort in a continual process.  I added two Dixon Ticonderoga pencils at the ends that are unsharpened, symbolizing the muteness of many people in our society without a voice or education.  These pencils are personally significant to me since Fort Ticonderoga fell exactly 200 years before, on the day I was born.  I’m a history buff.

FInished piece: Unravelry

FInished piece: Unravelry/Forgotten domocile

Knitting it up

Knitting it up


In progress

In progress


1 Muriel, M. (2016, November 1). Millions of Americans can’t vote for president because of where they live. PRI. Retrieved from https://www.pri.org/stories/2016-11-01/millions-americans-cant-vote-president-because-where-they-live.

Saturday Art Workshops — 10.27.18

Rube Goldberg Machines with colleen

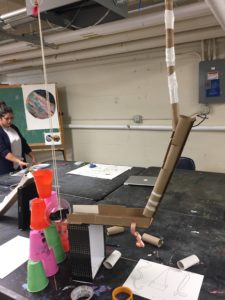
A machine that paints

A machine that paints

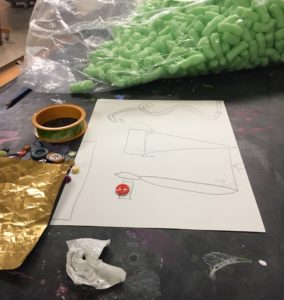
This week I helped out during Colleen’s lesson on Rube Goldberg machines. She started off by showing them Ok-Go videos and images of his sketches to get them intrigued and “get the ball rolling.” She engaged them by asking questions about Mousetrap the game and if they’ve ever heard of Goldberg or seen his inventions. We had two girls this week since one student was absent, and they really loved collaborating together at the beginning during the brainstorming session, and then ended up making two distinct machines.

Brainstorming drawings

Brainstorming drawings

Colleen instructed them to draw out their sketches and spent time talking with them about what machines they could invent such as ones for nail polish painting, applying make up and I added in some ideas as well. She showed them her 3-D example and told them they could make a machine that actually works or not.

The kids played around with the recycled materials as they were brainstorming to get their brains and hands moving which helped them generate ideas.

The trash cleaner machine

The trash cleaner machine

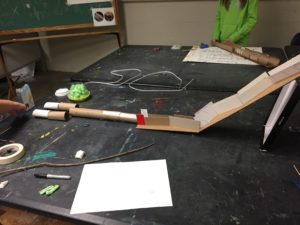
They surprised me by constructing really large machines that went from ceiling to table or table to floor. It was a physical process they were involved in and enjoyed being a part of. She also used a pop quiz with them towards the end and asked if they remembered the artist’s name we looked at as a kind of formative assessment.


Working on the machine

Working on the machine

Overall, this lesson was successful because she had materials prepared and organized, images for them to look over and discuss, an example which helped them visualize a possible machine, and engaged kids who produced well constructed and clear machines with an input and output.


Saturday Art Workshops — 10.20.18

Geological Abstractions

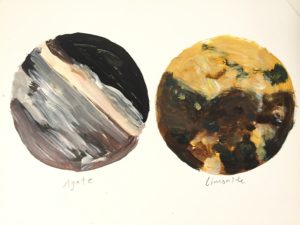
Observation of agate and sodalite

Observation of agate and sodalite

Observation of agates

Observation of agates

Observation of sodalite

Observation of sodalite

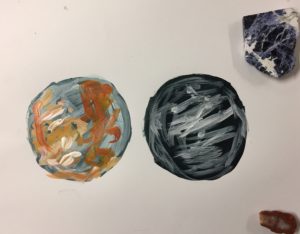
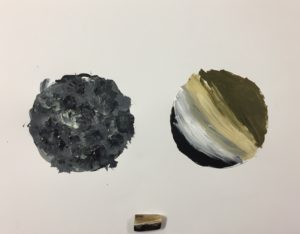
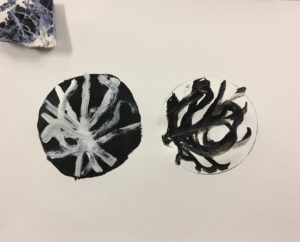
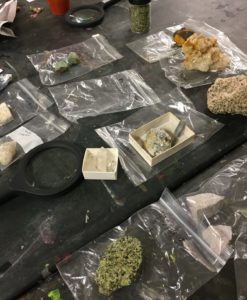
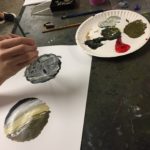
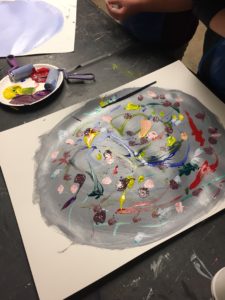
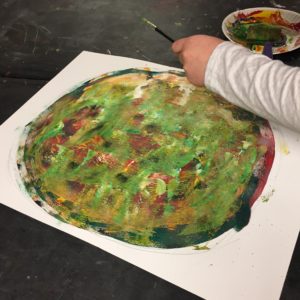
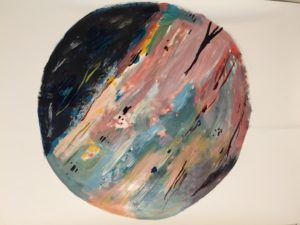
This week I taught a lesson where students observed and painted patterns and colors of rock samples that I borrowed from the geo-science department here at the University of Iowa. This lesson links geo-science with art, through the observation of crystals and minerals under a digital microscope where students enlarged sections with a partner or alone, and made a bigger, imaginary mineral formed through paint layering. Students learned about the types of minerals including metamorphic, sedimentary and igneous and how these are formed by viewing a PowerPoint.

Using analogous thinking, they used layering and the idea of structures and coloration as experimental methods to make abstract art, interconnecting the process of forming rocks with ways of painting. The observation part was interesting to me because as 4th and 5th graders, they’re moving into Lowenfeld’s pseudo-naturalistic stage of art and away from a more schematic stage, increasing detail and making things look as they are in reality.

Observation in process

Observation in process

Some rock examples

Some rock samples: one is even from the Earth’s mantle

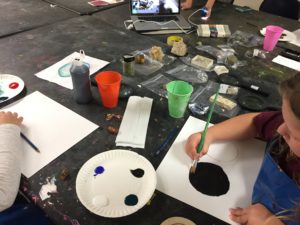
I started off the lesson in our opening ceremony asking them what they did this week that was creative, then launched into asking them questions about different types of rocks and if they had a collection, to get them engaged. I spread the rocks out on the table with magnifying glasses, so when they came in, they had something to explore. From the last lesson I learned to keep the materials at bay until I had explained the lesson, gone over the slides and quizzed them about types of rocks. This was more successful. According to Michael Linsin in “Classroom Management for Art, Music, and PE Teachers,” if you give clear directions to students to start with, then there is less confusion.

Painting a mineral

Painting a mineral

I asked them if they had any questions about the activity and then demonstrated scumbling and under painting, including using sandpaper. I explained how they would make two circles on paper using a roll of masking tape and then using the digital microscope, take a picture of their stone. After each one had taken a picture, I put the three images up on the computer so they could all see them. I think in a full class of students, I would have a few kids use the microscope and then enlarge on the projector so everyone could see and choose one.

"Killer Bunny"

“Killer Bunny”

"I Have Homework"

“I Have Homework”

"Rainbow Rock"

“Rainbow Rock”

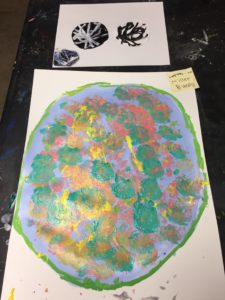
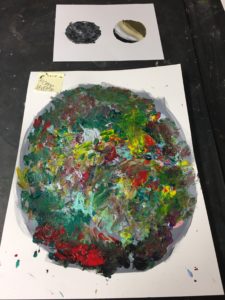
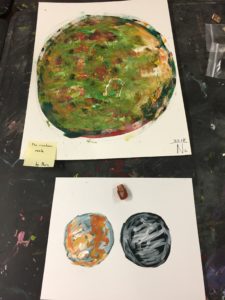
They completed their two small observation paintings and two chose to work together and one alone. After they finished drawing a circle on the large heavy, duty paper with a string attached to a pencil with tape, I explained to them that they would enlarge their small drawing by choosing either the pattern or the color as a starting point for their new rock. This seemed to go well and once they had paint in hand with a roller and brush it flowed out, in fact, too much. One group used a lot of paint, however, so next time I will mention to use paint sparingly. Together, we scraped some paint off the work.

Collaborating

Collaborating

Two girls completed both paintings together, and they came up with the ideas for the color and application as a team. They also asked themselves the question, “When is this finished?” which was great because I was going to pose that. Their response was: art is never finished and then I said you can both decide together when that moment is, based on what you want it to look like.

The other student finished her painting early and decided to free draw and work on her batik from a previous class as a sponge activity. Pacing seems to be variable, like in the other classes.

Working on "Rainbow Rock"

Working on “Rainbow Rock”

In “Formative Assessment in the Visual Arts,” Andrade, Hefferen and Palma talk about collaborative assessment that peers can do for each other as a useful tool. These two students played together with techniques, deciding what was working and what wasn’t. At the end, I had them write their title on a post-it note and place next to the paintings in the gallery walk. Each student talked about why they thought their piece was successful and how they started the process. Using this kind of self-assessment is helpful for all of us because they explain to other students what they are learning and the teacher knows too.

Overall, this lesson went well because the students were engaged in honing their observation skills, experimenting with new painting techniques, collaborating if they chose to, and displaying their pieces for their peers using an inventive title. They also learned more about rocks and minerals, so this lesson could tie into earth science in 4th and 5th grade.

Teacher Examples:

"Spacelite"

“Spacelite”


Observation Examples

Observation Examples

Donating Handmade Scarves to Twain Elementary School

four finger knitted scarves for the kiddos

As part of our community arts projects, we made four finger knitted scarves in bulky yarn made of wool and acrylic (in case of allergies).  After making two strands of these about four feet long, I sewed them together with a tapestry needle from the backside.  We’re donating them to kids.

Detail

Detail

Four finger knitted scarf

Four finger knitted scarf

Saturday Art Workshops — 10.13.18

Colleen’s screen printing Logos with Stencils

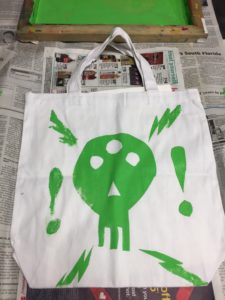
A logo stencil printed on a bag

A logo stencil printed on a bag

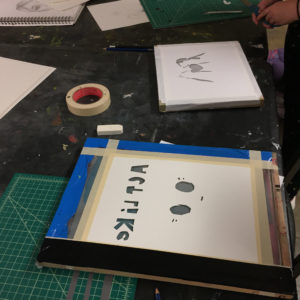
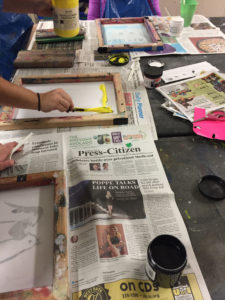
This week I observed and helped out in Colleen’s lesson on screen printing logos for invented organizations using stencils on paper. It was great to see she had materials on hand for them to make bandannas, t-shirts or a canvas bag if they wanted those. She started off by asking them about their creative activities this week during the opening ceremony that we have been doing. This got them engaged and was a nice transition into thinking about designing a logo while she showed her example stencil. She showed them the PowerPoint of various logos and asked them to interpret those. After that, she provided an informal assessment of their prior knowledge by quizzing them on semi-blank logos with parts missing, asking them to pare down to the essentials when they make their drawings for their logos. She requested that they make three sketches to start. One student groaned a bit but it was good for that kid to slow down a bit and think through her ideas more.

A logo stencil ready to print

A logo stencil ready to print

A logo about acting

A logo about acting

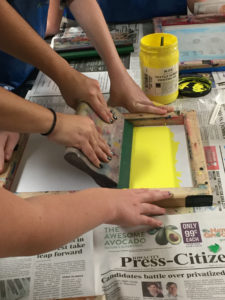
Putting ink on the screens

Putting ink on the screens

Applying the squeegee

Applying the squeegee

A kid's bandanna

A kid’s bandanna


After the sketches were approved and suggestions made, Colleen showed them how to screen print with her stencil in a demonstration. I thought the pacing of this lesson was successful for her in terms of how she introduced the idea and the parts of the activity. She also explained to them how to be safe while using an exact-o blade, which for 4th grade, can be tricky. They seemed to understand how the color would only be applied to the spaces that they cut out, so they had an idea already about negative and positive space and worked it out while they were making it. The collaborative aspect of requiring a partner to assist in holding the screen while another prints is a nice way to build community. One student had an issue with matching the squeegee size with the screen and so she had a limitation in material, but she solved the problem by just turning the squeegee so it fit better, which is part of the process of making art; the mistakes can either be helpful or a hindrance.

Overall this lesson was a success because the students were engaged, developed their ideas more fully through brainstorming and made productive results. The students have a good rapport with Colleen and each other as well.

Day of Remembrance at the Holden Cancer Center–10.3.18

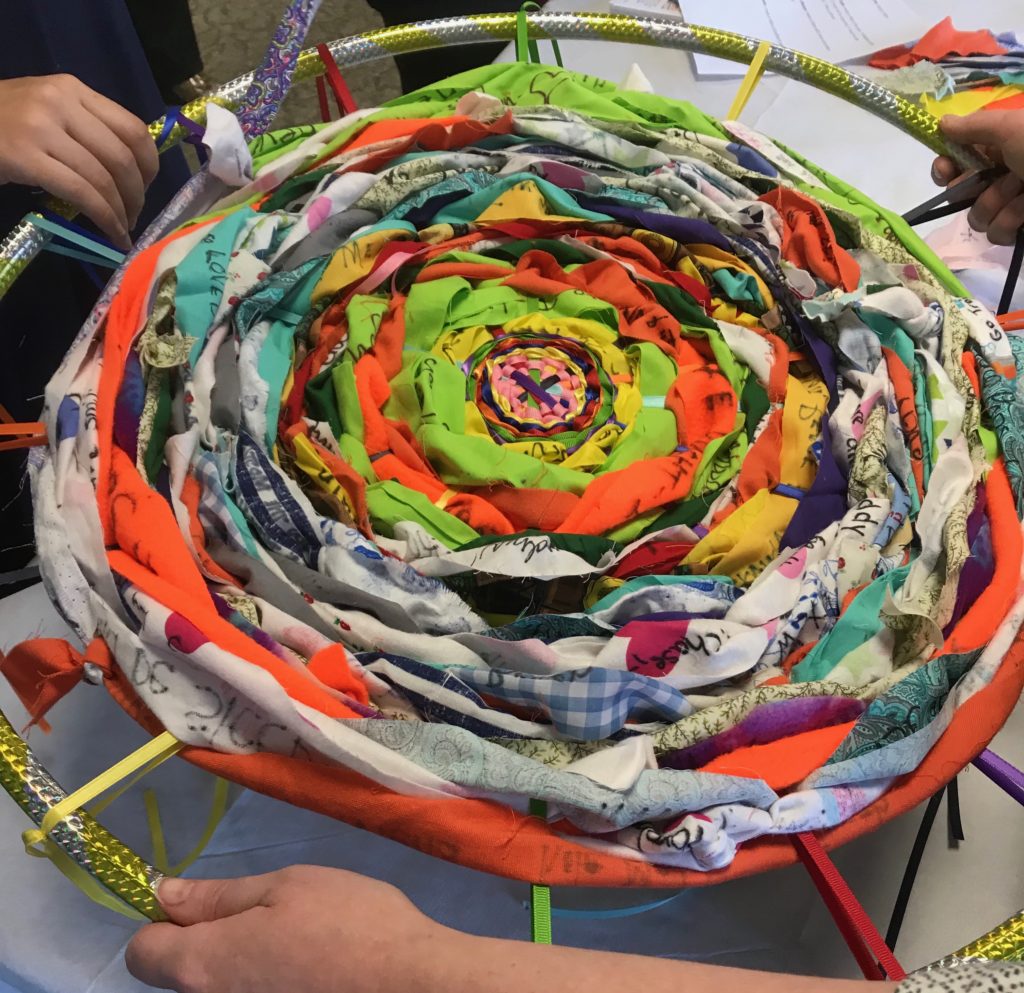
Memory Wheel

Memory Wheel

We volunteered at the Holden Cancer Center at the University of Iowa Hospitals as part of our class.  Bereaved people who had lost a relative or friend came and wrote on strips of colored fabric as a memorial to their loved one.  They could also snip a piece of the fabric and take it home on a card as a reminder of the day.  When completed, the ribbons formed a colorful wheel where the writing became private.

Inks & Chromatography

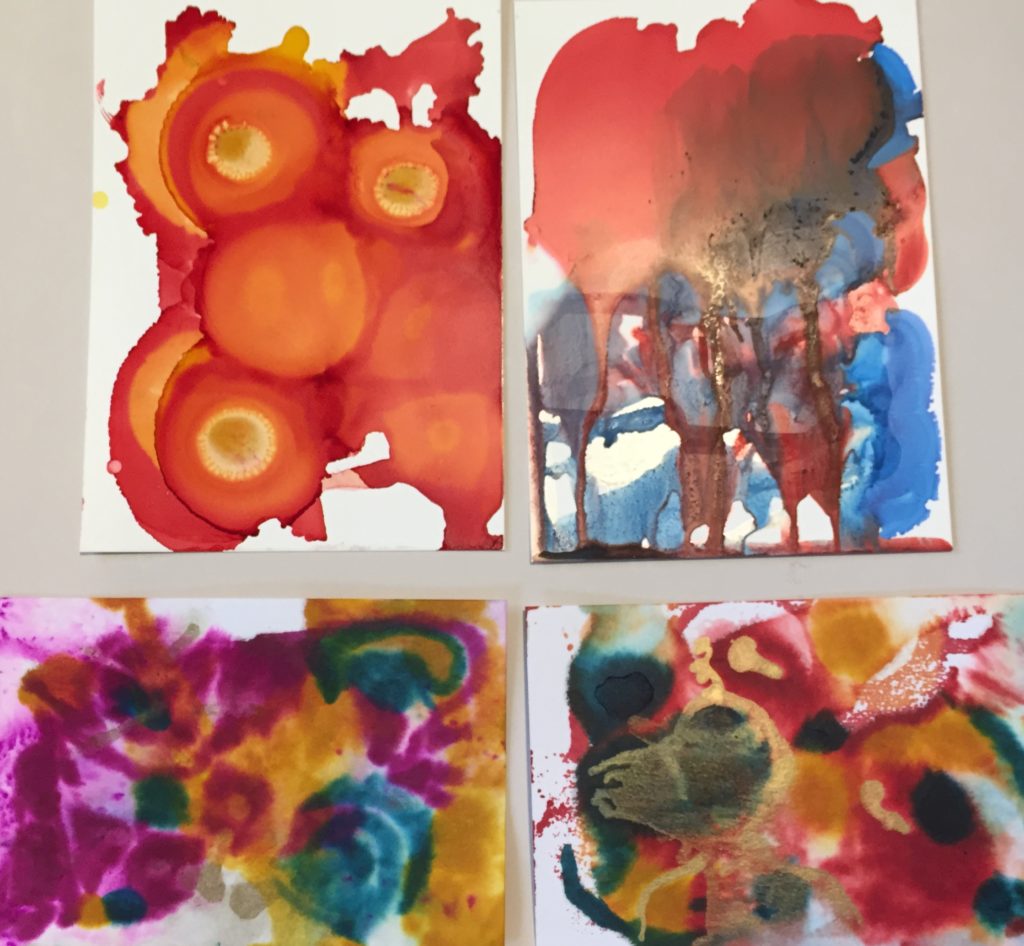
alcohol inks

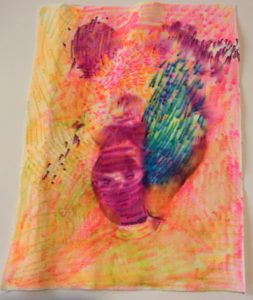
Alcohol Inks on Yupo and Watercolor Paper

Alcohol Inks on Yupo and Watercolor Paper

The watercolor paper gives a softer, mottled effect, whereas the Yupo paper is glossy and imparts brighter colors to your designs.  You can use layering as it dries, as well as a straw to blow the ink over it after you’ve applied the 90% rubbing alcohol with a dropper.  You can also move the paper around to make drips and designs.

Markers and Rubbing Alcohol

Sharpies and Watercolor Markers with Rubbing Alcohol

Sharpies and Watercolor Markers with Rubbing Alcohol

This process involved using washable water-based and fabric markers.  After you use them, you drop rubbing alcohol on them to create a tie-dye type effect. This was made on canvas.

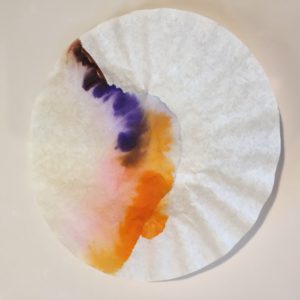
chromatography

Chromatography

Chromatography

This is a fun process that you could link to science lessons in your classroom, based on the idea of chromatography.1 This means that different colors have molecules that separate out based on how much they are absorbed by the paper.  Using a coffee filter, we applied washable markers to the paper and stuck in a cup of water part way.  The colors wicked up and separated out.


1 Keller, R., & Giddings, J. (2018). Encyclopedia Britannica. Retrieved from https://www.britannica.com/science/chromatography

Spinning Yarns about Textiles: Batik, Felting & Finger Knitting

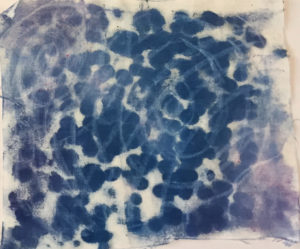
Batik: Toothpaste/lotion mixture & Crayon resist

Traditional batik was brought to Africa in the 19th century by English and Dutch traders traveling from Indonesia before stopping in Africa. Many African tribes, including the Yoruba from Nigeria, Wolof and Soninke from Senegal, and Bamana from Mali, started to experiment with their own designs using mud, cassava starch and rice paste instead of wax to resist the
dye.1

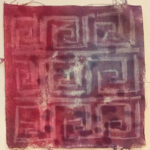
For our own batik examples, we used a novel combination of white toothpaste mixed with lotion in about equal quantities.  You can use any type of lotion: petroleum or plant based.  One option is to make a drawing on a piece of paper underneath and then trace with the mixture in a squeeze bottle over the top on the fabric, or you can freely apply, which is what I did.

Crayon Resist

Crayon Resist

Batik Toothpaste & Lotion

Batik Toothpaste & Lotion

Crayon Resist

Crayon Resist

I made a Greek keys design since I’m half Greek.  After you let the mixture dry for about two days, you can apply the fabric dye (or acrylic paint thinned with water) in any manner you choose.  I noticed that the dye bled through the fabric to the newspaper underneath, so I used that under a new sheet of fabric and dotted the dye back up into the design with my finger.

You can rinse out the dye after it has dried on any of the samples if you wish, but you have to rinse the toothpaste mixture one in cold water to remove the paste. Then hang to dry.  With the crayon resist, you can iron it under a newspaper to remove the wax after dyeing.

Wet & Dry Felting

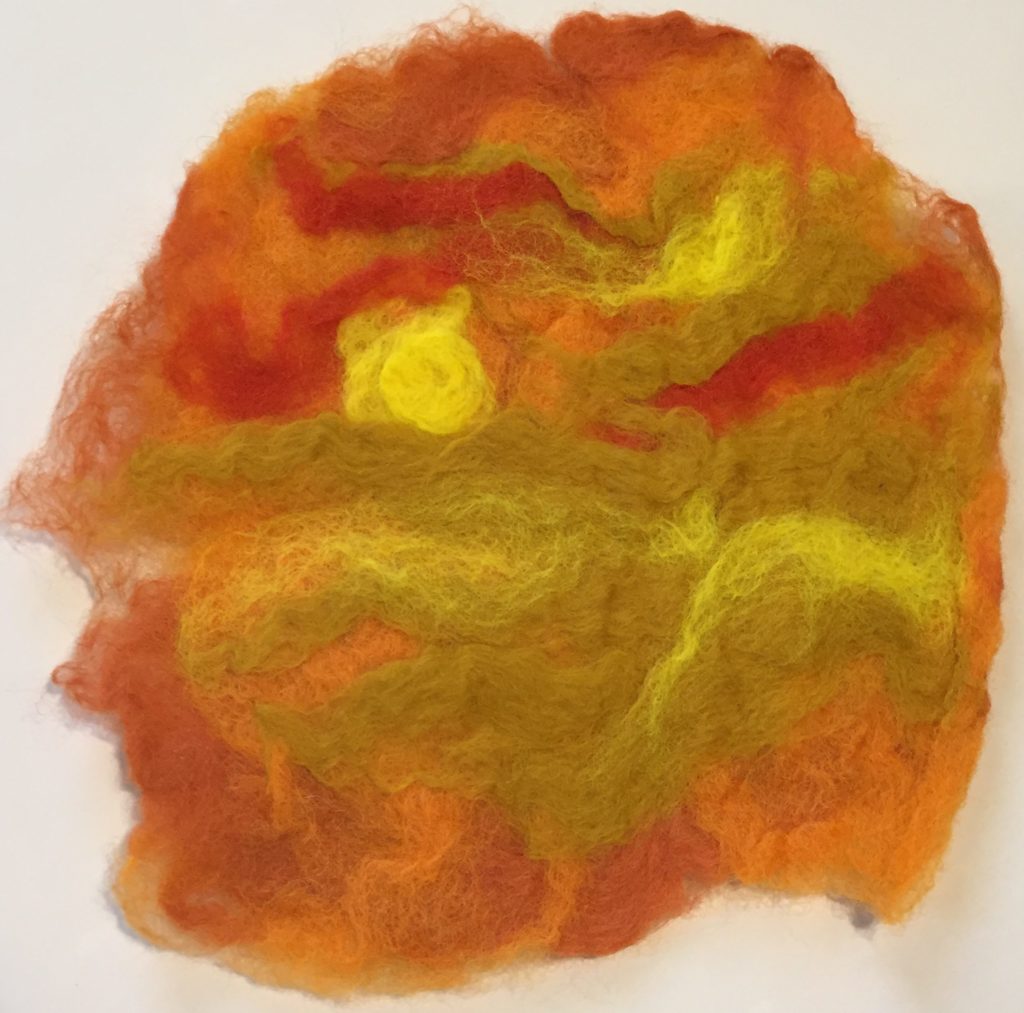
Wet felting is created through a process using wool roving from sheep.  I layered the felt by pulling bits apart and placing in a composition.  Each layer goes on top at a 90 degree angle and you can use about 4-5 layers, that way you don’t have holes in your felted object.

Felted Landscape: Sunset

Felted Landscape (wet): A Sunset or Jupiter?

Then you place in a plastic bag and spray with a  mixture of natural soap like olive oil and warm water because it has low suds. After sealing, we used a bamboo sushi roller under the plastic bag containing the wet felt, rolled up and agitating the bag for around 20 minutes, turning the bag every so often and re-rolling.  Allow to dry at least overnight.  This is a safe process for kids.

Dry needle felting is made by stabbing layers of roving with a felting needle around size 38.  The puncturing process holds the layers together as a type of felt that tends to be a bit hairier than wet felting, in more ways than one.

This isn’t a very safe technique for kids younger than middle school for sure, and probably mainly for those who are advanced, because you end up nicking your fingers if you’re not paying attention.

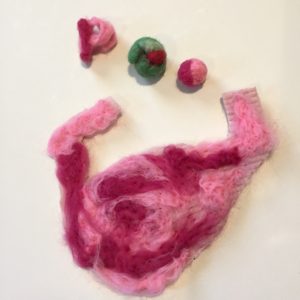
The letter P in the image below was made in a tiny cookie cutter and was probably the hardest to wrangle.

Felted Stomach with a Pimento, the Letter P and a Felted Gumball

Felted Stomach with the Letter P (also dry), a Felted Gumball (dry) & a Pimento (wet)

finger knitting

Finger knitting can be done on one or multiple fingers, in this case, we used four.  I used to do this as a kid and remember making a purse.  You start by making a slipknot for the one finger method, taking the yarn back around your finger and bringing the lower one up over the higher one and off and repeating.  The four finger method is easier to watch than explain in words.

For our class, we’re donating the scarves we made to Mark Twain Elementary here in Iowa City as part of community arts.

One finger knitting

One finger knitting

Four finger knitted scarf

Four finger knitted scarf

Detail

Detail


1Kitenge Store. (2018). Retrieved from https://kitengestore.com/traditional-batik-making-ghana-west-africa.

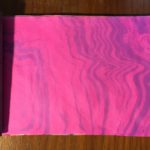
Sampler Book with Handmade Papers

a great way to collect your paper experiments

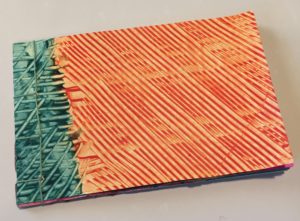
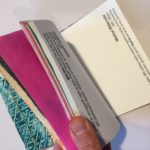
Sampler Book

Sampler Book

Sampler book pages

Sampler book pages


Our sampler books contain many of the handmade paper explorations we’ve done in class, linked here, such as Turkish, Suminagashi, shaving cream, Prang Ambrite pastel, rice or cornstarch paste paper, and handmade recycled paper.  I listed corn husk and papyrus paper below as well, which were all really fun.  I included many different types of drawing papers tucked away inside.

Rice paste paper

Rice paste paper

Shaving cream paper

Shaving cream paper

Cornstarch papers

Cornstarch papers

Turkish marbling

Turkish marbling

Suminigashi paper

Suminigashi paper


Handmade recycled paper

Handmade recycled paper


Other drawing papers

Other drawing papers


Inside we placed other papers suitable for watercolor and drawing, such as marker, pastel, illustration and various drawing papers.  These will come in handy when I’m thinking about new drawing projects for the kids and trying to decide which paper for them to use.

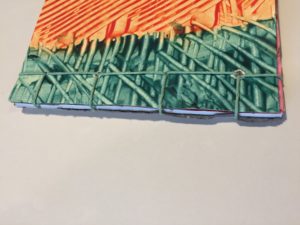
Japanese Stab Binding

Japanese Stab Binding

This is a form of binding which is suitable for small books that are not too thick, maybe an inch or less.  It’s a simple and elegant way to bind pages together.

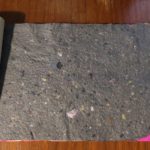
Handmade recycled paper

Handmade recycled paper

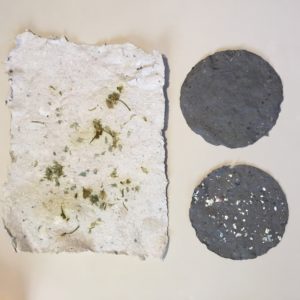
Here is some recycled paper made from soaking bits of paper overnight and then chopping up in a blender until they are fairly smooth.  You need to add a fair amount of water when doing this.  If you use a rag paper as an additive (in small quantities), you should use 100% cotton since it’s easier to work with.  After using a shaped screen and sponging the water out, it was fun to play with various colors and silver leaf bits as well.  You can add botanicals like flowers or seeds if you wish, during the screening process.


Other paper experiments: Corn Husk & Papyrus

Flattening the papryrus core

Flattening the papryrus core

Assembling the corn husks

Assembling the corn husks


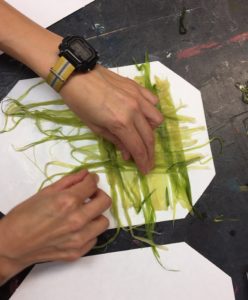
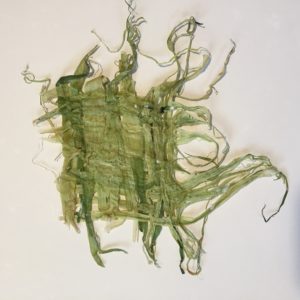
We made corn husk paper out of husks which are soaked in soda ash and cooked for 2 hours, which breaks up the fibers.  For this process you need to use gloves, a dust mask and good ventilation as well as only a stainless steel or enamel pot.  It can be quite toxic. Our teacher did this part for us. Then, you lay out the husks on a couch sheet to absorb the water, close together like weaving.  Afterwards, you press the papers together on a blotter paper or flower type press.

Corn husk paper

Corn husk paper

Papyrus

Papyrus

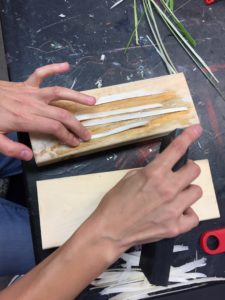
For the papyrus paper, we began by using veggie peelers and removing the green parts of the papyrus entirely until the white core remained.  Then, we peeled the white parts into smaller units and crushed under a rolling pin and blocks of wood to increase the surface area.  We soaked these a couple of days in water. After weaving these together, leaving some holes since that’s what I like, they were dried for quite a few days under some heavy weights. It takes three days to dry the green and six if you use the white parts.


Exploring Sketchbook Ideas

diving into new sketchbook Lessons from classmates

For our Art Education Studio class, each of us concocted sketchbook ideas that are out of the ordinary, centered around drawing.  During each week of class, we are creating one of these problem-based assignments that are open-ended with some boundaries for concepts, techniques and materials.
Mapping Identity

Mapping Identity

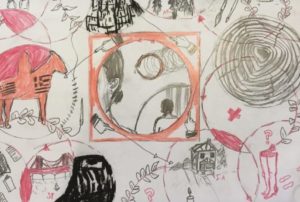
For our introduction to the class assigned by our teacher, I made an identity map with concepts and events from my life. I used circles to represent the spirals of things I’ve lived through and as a shape of continuity and wholeness in each time period. The only parameter was to draw a 3 inch square in the middle and go from there.
Sketchbook Investigation 1

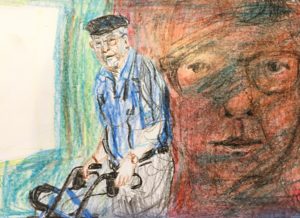
Sketchbook Investigation 1: Self-portrait

Assignment 1 was a self-portrait made using a reflective surface other than a mirror with 16 crayons.  I used my computer screen which is a memorial to my grandpa, so I can see him everyday.  I layered the crayons and melted them off with an iron with a paper on top.  Then I went back in with a knife and scraped some more off before adding additional crayon.
Sketchbook Investigation 2

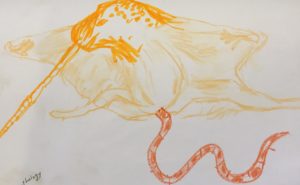
Sketchbook Investigation 2: My First Chimera

The second one I made was three animals pieced together that was alive now or had been at one point, each with a different drawing medium. This became a narwhal-snake-flying squirrel creature of land, earth and sky.  I used crayon, colored pencil and marker.
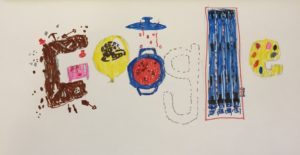
Sketchbook Investigation 3

Sketchbook Investigation 3: Google Doodle

For this assignment, we made Google doodles about ourselves that might appear on the homepage for Google search.  I made this out of marker and it shows an archeological dig, a balloon, cookware and a pool, among other things, showing my interests.
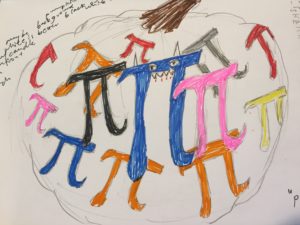
Sketchbook Investigation 4

Sketchbook Investigation 4: Pumpkin Pi

For this one, we made an initial design for a pumpkin to be auctioned off at Shelter House, a local organization that helps the homeless.  I used acrylic paint.  Actual pumpkin decoration linked here: https://arted.tessasutton.com/2018/09/20/pumpkin-auction-at-shelter-house.
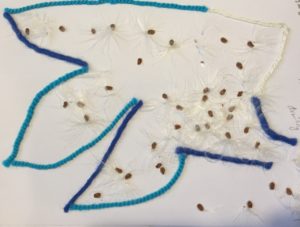
Sketchbook Investigation 5

Sketchbook Investigation 5: Dreamy Milkweed

In this assignment, I created a composition without using traditional drawing materials.  Here, I used milkweed I gathered on one of my many walks near my home and some scraps of yarn.  I glued them on.
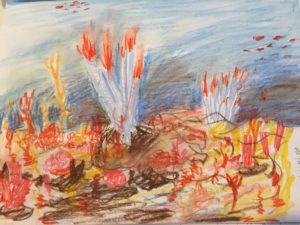
Sketchbook Investigation 6

Sketchbook Investigation 6: The Mariana Trench

In #6, our parameters were to draw a place from imagination using lots of rich color and detail.  Using chalk colored pencils, I drew the Mariana Trench which is located off Guam.  I’m interested in the stillness and quiet found there as well as a sense of the unknown.
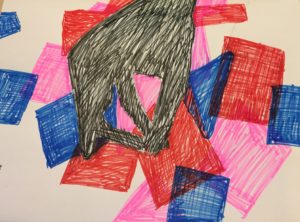
Sketchbook Investigation 7

Sketchbook Investigation 7: Shadows and Colors

This one was about drawing a part of our body’s shadow cast by a light and then placing colors  around it that we identified with.  I chose markers and made shapes, thinking of a quilt around my hand.
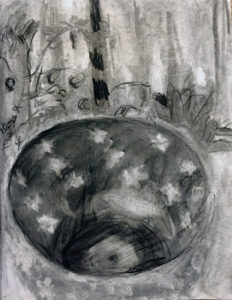
Sketchbook 8: looking into depth

Sketchbook Investigation 8: Looking into Depth

Using vine charcoal rubbed over the paper and then erased with a gummy eraser, I placed an object obscuring the view and then drew the scene. I went back in with a compressed charcoal, which is darker, to make the darks more absorbing. This gives you a background, middle and foreground.

Sketchbook 9: Illuminated Letter

Sketchbook Investigation 9a: Illuminated Letter

For this assignment, we used a stencil to make an illuminated letter of our choice that we made a lino-cut out of, which you can see here.  I have an interest in social studies, so I created a re-make of Ben Franklin’s, Join or Die (1754), in relation to the colonies uniting for the French-Indian Wars.  This was later co-opted by the American Revolution as a banner against England.  I’m using this to say that democrats and republicans should rise up together against the evils of the day.

Sketchbook Investigation 9b: Traveling On

Sketchbook Investigation 9a: Traveling On

This is the sketch for a dry point etching on plexiglass that we made in class. It relates to a personal story of traveling. You can see the finished intaglio here.
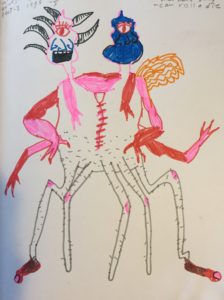
Sketchbook 9b: Making a Monster

Sketchbook 9b: Making a Monster

In this sketch assignment, we needed to have 10 monster parts of different categories such as horns, eyes, noses, feet, etc.) I rolled a die to give me the number for each part.   This is in marker.  I thought this lesson would be great for elementary and junior high and gets your creative monster juices flowing.
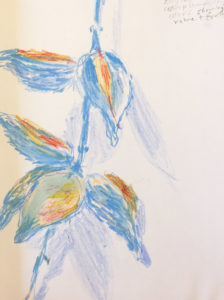
Sketchbook Investigation 10: Drawing from Nature

In this assignment, I drew a dried out milkweed with pods that I found on a walk because we were supposed to draw something from nature using complementary colors showing value and form. I used Stabilo pastel colored pencils, which I like to use because they blend easily.  I used orange and blue with a light periwinkle as a shadow to provide definition and context.
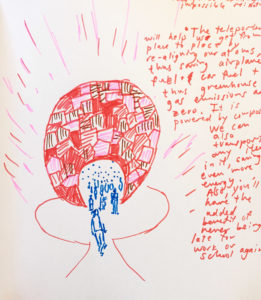
Sketchbook Investigation 11: Imagine the Impossible

For this one, we were supposed to create something impossible that could potentially be possible, relating to some aspect of the natural. I chose to make a teleportation device.  We could not only move ourselves from place to place without greenhouse emissions from transportation, but also move materials easily.  You would never be late to work or school again, and you could live anywhere in the world with no commute.
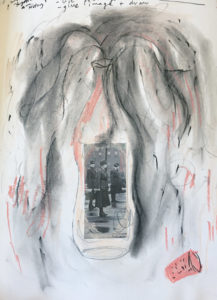
Sketchbook Investigation 12: Chance Encounters

Sketchbook Investigation 12: Chance Encounters

For this lesson, which was my lesson that I submitted, I had my classmates use a fragment of an image taken by chance from the internet based on sentences or phrases in the last work they made and generate a new drawing incorporating some aspect of a poem from a poem generator online. Steps are below. Drawing materials and techniques were their choice. My example is in pastel and pencil.  I used an image of the Spanish Flu from WWI after googling “forgotten American history.”  I made sort of a Pandora’s box in the shape of a bottle.
  1. Look back at your last piece of completed art and describe it with a phrase or sentence that you associate with it, poetic and/or conceptual. Use more than one word.
  2. Go into Google search and type in your phrase and see what comes up under images.
  3. Choose 6 images and roll a die, assigning each a number. If you don’t have a die, you can randomly pick a number.
  4. Print out this image In any size you like and cut into 4 equal parts. Close your eyes and chose a section. Paste or tape this into your sketchbook.
  5. Using a poem generator, add phrases that you used earlier.
  6. Incorporate the image and poem concepts as you see fit.